BeautyMe Love Recipes

BeautyMe Love Recipes

Saturday, July 20, 2013

Red Bean Pastry (红豆酥)


I had this plan to make Red Bean Bun (豆沙包) with the red bean paste that I bought but when I saw the ready made puff pastry in my freezer, I decided to make this quick snack, Red Bean Pastry (红豆酥) instead. Surprisingly, everyone in the family love this snack and kept asking for more. A simple and easy snack that can make anytime.


Ingredients

Store bought Puff Pastry
Red bean paste
White sesame seeds
1 beaten egg, for brushing

Directions

1. Take puff pastry out from freezer and place a sheet of pastry on board. Slice pastry into 3 long parts and 1/2 each long parts to form a rectangular (you can cut the pastry according to your preference sizes).
2. Place base pastry on a baking sheet and spread red bean paste. Cover the top with the other 1/2 rectangular pastry.
3. Press edges of pastry together with a fork. 
4. Brush the top of the puff with some egg wash. Sprinkle the white sesame seeds on the top and bake at 180 deg C for 25 mins or until golden brown. 

Sunday, July 14, 2013

Apple Pie


I found this recipe from a book "The Worry-Free Bakery". Instead of making the dough as instructed, I used the store bought puff pastry which really saved me alot of work and time to make the dough. Just then when we were about to eat the apple pie, we heard the ice cream man coming and without hesitation, we went to get the 3 different flavors (Raspberry, Sweet Corn and Chocolate). Oh my godness, the pie was equally crispy and the ice cream really compliment the apple pie. Yummy!

Ingredients

Store bought Puff Pastry
2 red apples 
4 tbsp sugar
2 tsp cinnamon
1 beaten egg, for brushing

Directions

1. Peel apples, then slice into thin wedges. Place apple slices in a microwave-safe bowl. Add sugar and cinnamon and stir. Heat for 5 mins and drain off any liquid.
2. Take puff pastry out from freezer and place a sheet of pastry on board. Slice pastry into half.
3. Line apple slices on one half of pastry (you can cut the pastry according to your preference sizes).
4. Use a knife to cut line along the centre of the other half pastry and place on top of arranged apple slices.
5. Press edges of pastry together with a fork. 
6. Brush top with beaten egg and bake at 180 deg C for 25 mins or until golden brown.

Saturday, July 13, 2013

Cake In A Cup

With the overestimated bought fruits (Strawberry, Kiwi and Peach), I decided to make this Cake In A Cup for my family. I used the Classic Sponge Cake recipe (you can use any cake recipe of your preference) for the layer cake and cut the cake into shape of heart using the cup opening. I started spreading whipped cream and added kiwi on top of the cream, following by a layer of cake and whipping cream. Finally, it was finished with some decoration of fruits on the top. 


I have failed to whip Emborg whipping cream before and this round I decided to give it another try. The consistency was not as stiff as Redman Whip Topping but it turned more stiff after refrigerated. The overall combination was perfect and everyone enjoyed the fruity desserts.    

Friday, July 12, 2013

Fruit Tarts - Orders 2013

Additional 2 more orders of Fruit Tarts on 12 & 13 July 2013

Mini High Tea - Orders (2013)


I am so blessed to receive an huge order for a High Tea snacks of Fruit Tarts, Egg Tarts, Brownies, Mini Cream Cheese Cupcakes and Seafood Sandwiches for a Company Grand Opening on 12 July 2013. Everything went well as planned with all the baking completed on the day before and the assembly of Fruits Tarts and sandwiches on the actual day. I am also very fortunate to have the opportunity to do the setup of my High Tea layout for the first time at the event venue. Indeed a great learning experience and I felt great accomplishment especially receiving compliment from my customer. 

Thursday, July 11, 2013

Vegetable Tempura


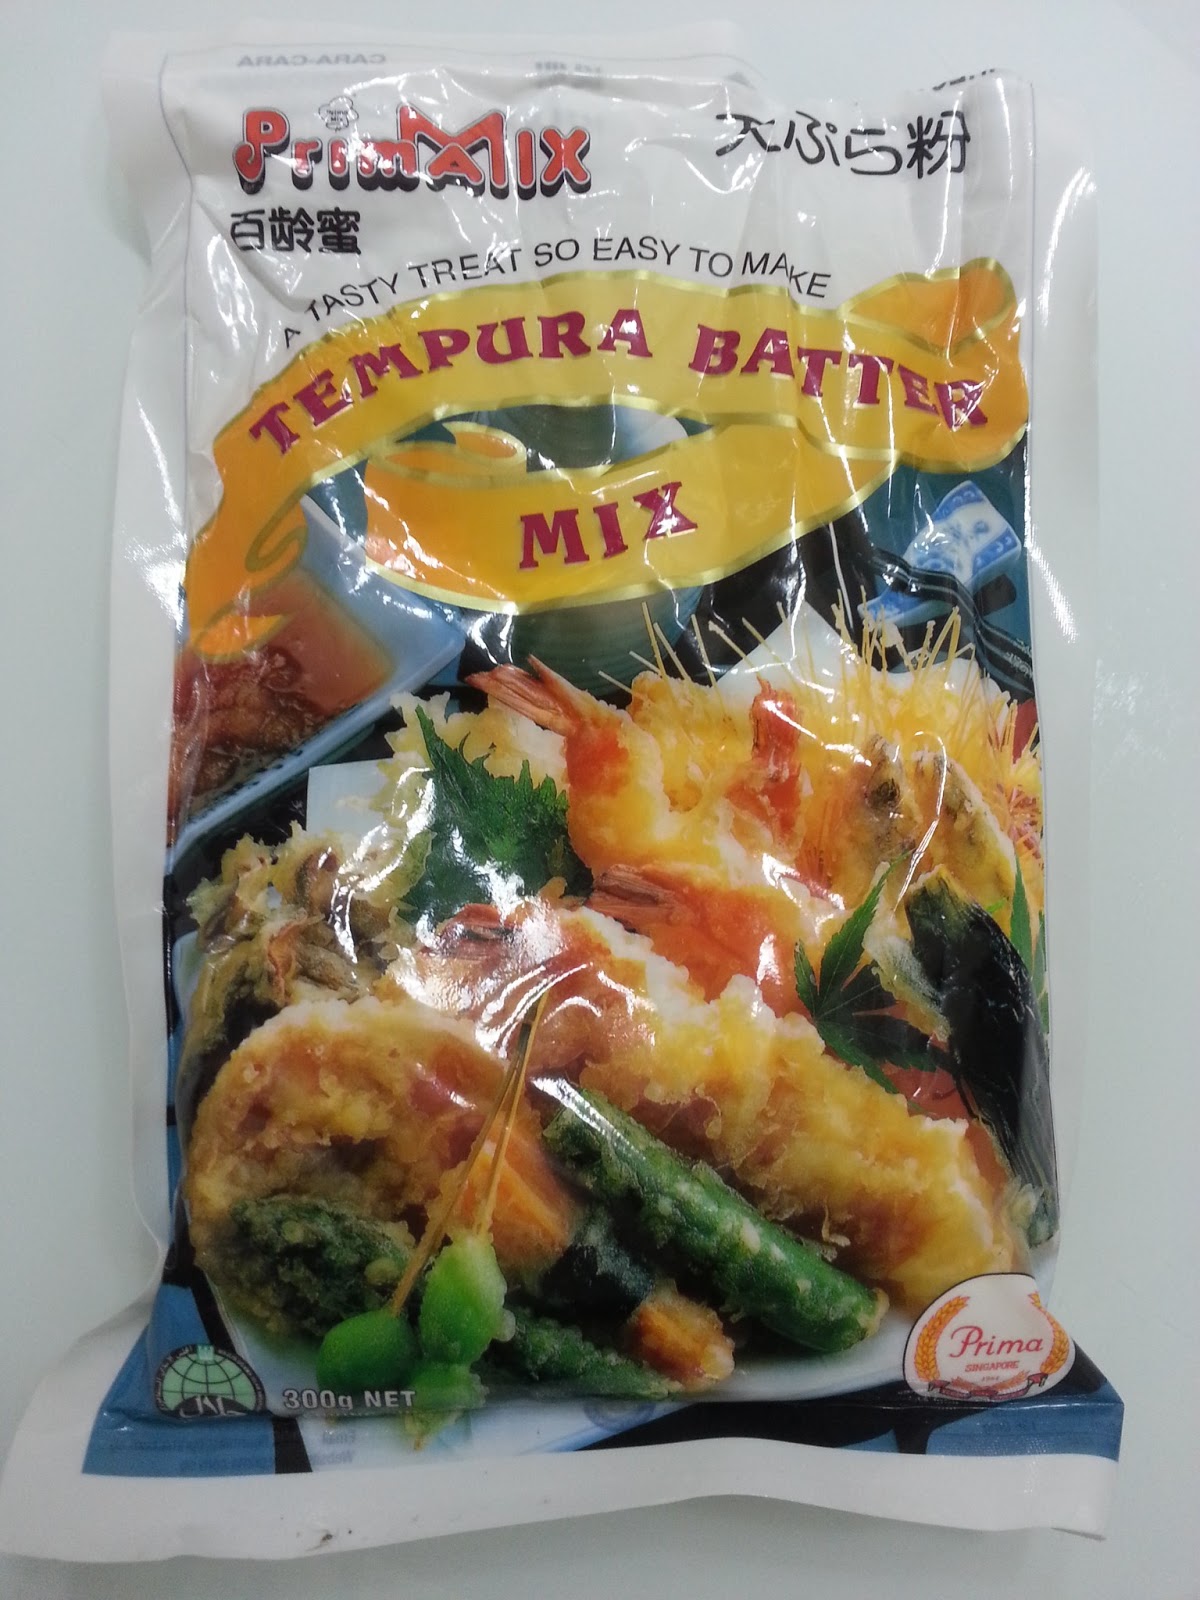
I always love the vegetable tempura from Japanese restaurants and this is the only method of cooking that my kids and I will eat brinjals (together with carrots & cauliflowers). I have tried coating it with egg and flour before frying but the result was not to my satisfactory. I went to supermarket one day and found this tempura batter and Teriyaki Sauce. Though the overall taste not as good as those served in Japanese Restaurants but these were very close. My kids and MIL like this dish very much but I can only allow this fried dish once in a while. 

Sunday, June 30, 2013

Fruity Rainbow Cake


Another great opportunity for me to design a birthday cake so I had this idea to bake a fruity and colourful cake. I decided to use butter cake recipe and added 2 layers with different colours to it. Instead of using whipping cream, I replaced with cream cheese mixture to cream the whole cake. I am very happy with the overall fruit decoration though it took me quite a while to assemble them. Indeed a great accomplishment for me when I received the compliments from everyone who tasted it! 


Monday, June 24, 2013

Celine's 9th Birthday on 23 June 2013

Celebrating Celine's 9th Birthday with Mummy's special made Hello Kitty cupcakes and her special request Monkey Cake 


Saturday, June 8, 2013

Cashew Chicken with Capsicum


The original recipe is for Kung Pao Chicken but since I am not a chilli person, I decided to modify this recipe to suit my taste. I replaced dried chillies with capsicums and well, it just achieved equally impressive result. Glad that my kids and MIL love this dish as much as I love it.


Ingredients

250g skinless, boneless chicken breast (diced)
1 tsp rice wine
1 tbsp cornstarch
2 tbsp olive oil
1 tsp chopped garlic
1 pc ginger slice
1/2 yellow capsicum
1/2 green capsicum
1 handful cashew nuts
1 stalk of spring onion 

Sauce
1.5 tbsp light soya sauce
1/2 tsp dark soya sauce
1/2 tsp rice wine
1 tsp sugar
dashes of pepper
2 tbsp water
1 tsp cornstarch

Directions

1. Marinate chicken with rice wine and cornstarch for 10 mins.
2. Mix all ingredients for the Sauce in a small bowl and set aside.
3. Heat oil in frying pan and add in slice of ginger stir fry till brown.
4. Add in chicken cubes and stir fry till cooked. Then add in capsicum and cashew nuts.
5. Add the sauce and stir continuously until chicken meat is nicely coated with it.
6. Sprinkle the spring onion and ready to serve.

BBQ Pork Puffs (Char Siu Soo)

Another interesting recipe from Easy Chinese Recipes by Low Bee Yinn that I am so excited to try out. Actually, if you can buy ready made Char Siu (BBQ Pork) from the market or food stall, it will save you alot of time. However, as I am not able to find ready made ones, so I baked the Char Siu myself. I got some lean meat (choose meat with a little fat will be nicer), marinated with BBQ sauce and baked it.

Before I made these puffs, I was quite curious if they could turn out exactly like those in the Cookbook. I have used this pastry to make other sweet desserts before but they were very much flaky as compared to those in the book. I went "Wow" when the puffs were out from the oven with golden brown top and nicely puffed. They were really pretty & yummy!

Ingredients

2 sheets store bought puff pastry
1 egg yolk (beaten for egg wash)
sesame seeds
some flour for dusting

Filling
250g Char Siu (BBQ pork), diced into small pieces
some chopped coriander leaves(I used spring onions)
1 tsp garlic
some olive oil

Sauce
3 tbsp honey
1.5 tbsp hoisin sauce
1 tbsp light soya sauce
1 tsp rice wine
dashes white pepper
1/2 tsp five spice powder
1/2 tsp sesame oil

Directions

1. Heat the oil in a frying pan. Add garlic and then stir-fry to light brown before adding the Char Siu.
2. Add in the sauce, spring onion and cook till sauce becomes thick and sticky. Dish out the filing and let cool.
3. Cut the pastry sheets into 10cm squares.
4. Add about a heap of filing to the center of the pastry. Fold the puff pastry over to form a triangle. Do not overfill. Seal the edge tightly by pressing firmly with your fingers. Make sure there is no leakage.
5. After sealing, use a knife to cut the uneven edge to form a uniform triangle. Use the back of the fork to make a pattern around the edges. 
6. Brush the top of the puff with some egg wash. Sprinkle the white sesame seeds on the top and place the puff on a baking sheet.
7. Preheat the oven to 175 Deg C and bake the puff until they turn golden brown, about 20 minutes. Serve hot.

Friday, June 7, 2013

Light & Refreshing Orange Sponge Cake

My dear ex-colleagues knew that I do not like to do folding method cake but have given me a KPI to master folding method after I left the company. So after some searching for a simple recipe to start with, I am so happy to find this Orange Sponge Cake from Hearty Bakes which only used 3 eggs. But I didn't realise that there were 3 tricky steps of folding ie egg whites, flour and oil. With the KPI in mind, I bravely proceeded and prayed hard that all my steps were done correctly. The very moment the strong orange aroma and beautifully risen cakes came out from the oven eased off all my worries. It was awesome and the cakes were super soft and spongy. Really great satisfaction for meeting my KPI.

Ingredients

4 yolks
16g sugar
3 tbsp of fresh orange juice
Orange zest from 1 big navel orange 
100g cake flour
50g corn oil

4 whites
80g sugar

Directions

1. Whisk yolks and sugar till light. Add in the orange zest and juice, continue whisk till pale in color.
2. In another bowl, whisk whites to soft peak and add in sugar, continue to whisk until stiff.
3. Gently fold in whites mixture with the yolks mixture with hand whisk until well-blended.
4. Sieve in the flour and gently fold until batter is well-combined. 
5. Lastly, fold in the corn oil until well incorporated.
6. Spoon batter into fillers and bake at 180 Deg C for 30min or until a toothpick inserted in the center comes out clean.

Clay Pot Tofu


Finally, I got some time to cook a nice lunch for my family. I found this recipe from a Cookbook by Low Bee Yinn (Easy Chinese Recipes) that I have borrowed from the library. I always like this kind of dish but just could not get the right taste and I am so glad that I am able to whip this up deliciously now and confirmed with all the thumbs up from everyone in my family. Whole lot of accomplishment cooking this lunch for my loved ones.

Ingredients

4 Shitake mushrooms (cut into halves)
1 block of tofu (cut into cubes)
1 slice of ginger
8pcs frozen shrimps
1/2 canned baby corns
1 bunch of chinese cabbage (cut into small pieces)
1/2 carrots (cut into small pieces)
2 tbps of olive oil

Sauce
1 tbsp light soya sauce
1 tbsp oyster sauce
1 tsp Rice wine
1/2 tsp sesame oil
1/2 tsp sugar
3 dashes white pepper
1 tbsp cornstarch
1 tbsp water

Directions

1. Mix all ingredients in the Sauce in a small bowl and set aside.
2. Deep fry tofu to a light golden brown. Drain off excess oil and discard oil.
3. Heat 2 tbsp of oil in a clay pot over high heat. Add ginger and stir-fry to a light brown before adding carrots, shitake mushrooms, shrimps and baby corns. Stir and add tofu, chinese cabbage until all ingredients are well combine.
4. Add sauce, lower the heat and stir until all the ingredients are well coated with the Sauce.
5. Covered the clay pot with its lid and simmer for 3 minutes. Ready to serve.

Sunday, June 2, 2013

Ice Cream Cone Cupcakes

My kids wanted to invite their friends over to our house to play, so I decided to plan a Mini High Tea for them. I spotted this Ice Cream Cone Cupcakes in one of the baking books that I borrowed and I was so excited to try it out. I made my own creation with my favorite Chocolate Cake in the cone and  frosted the top with cream cheese. Really so happy that it turned out well and yummy! The kids enjoyed themselves and the smiles on their faces were my greatest satisfaction. 

One flaw for this recipe is that the Ice Cream Cone will turn soft once placed outside for too long but still taste yummy overall.

Ingredients

2 eggs (room temperature)
1 egg yolk (room temperature)
55g sugar
a little salt

36g milk
50g self raising flour
10g cocoa powder

125g cream cheese
50g icing sugar (shifted)
3 tbps Milo

Directions

1. Preheat oven at 170 deg C.
2. Whisk eggs and egg yolk, sugar and salt till pale and ribbon stage.
3. Add milk, follow by flour and cocoa powder until just combined. Do not over beat.
4.Fill the cone 3/4 full and bake for 15mins.

Topping : Whisk cream cheese, icing sugar and milo together (place the mixture in fridge for a while). Scoop into piping bag and pipe out on top of cone. Decorate with colorful sprinkles.

Thursday, May 23, 2013

Chocolate Chips Cookies - Orders (2013)

Baked on 20 May 2013


Thanks to Eva Teo for ordering these Chocolate Chips Cookies for her son's birthday party. I have personalized them with his name on exclusively designed cards and tagged to each pack of cookies. Hope he likes the cookies and have a wonderful party.

Low Fat Banana Cake

Baked on 20 May 2013

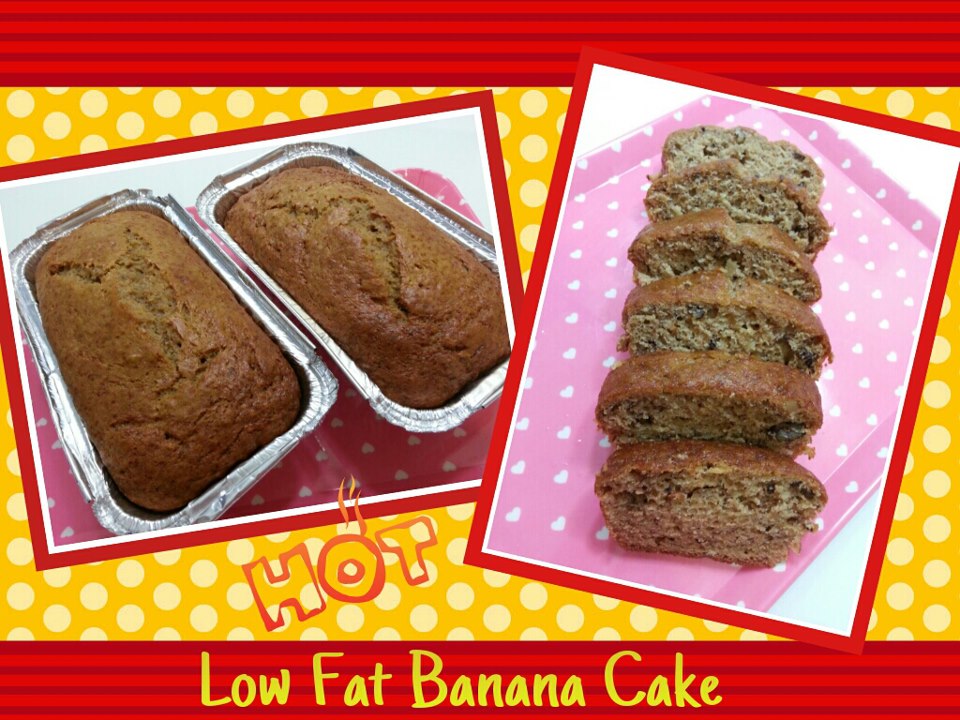
I always wanted to bake banana cake that are moist and with the sweet banana flavors and I am so glad that I finally made it! This is the best banana cake I have made so far and those who tried it also agreed with me. The important tip to make a good banana cake is to use bananas that are very ripe (those with many black spots on the skin). You will be amazed that it will bring out an excellent sweetness and banana flavors. Give it a try and I am sure you will like it too.

Ingredients

240g mashed ripe bananas (about 2 large bananas)
1 tsp baking soda
120g low-fat plain yogurt

60g canola, vegetable, or corn oil
120g light brown sugar
1 large egg (60 grams)
1 tsp vanilla essence

200g plain flour
1/2 tsp ground cinnamon
1 tsp baking powder
1/4 tsp salt

80g Walnuts

Directions

1. Preheat oven to 180 deg C and grease 2 loaf pans with oil.
2. In a large bowl, mix the mashed bananas with the baking soda and yogurt. Allow to sit while you prepare the rest of the batter.
3. Meanwhile, whisk together the oil, sugar, egg and vanilla till well mix.
4. In another large bowl, sift together the flours, baking powder, ground cinnamon and salt.
5. Add the banana mixture into the oil mixture and mix till just combined, Then add the flour mixture and mix well.
6. Add in walnuts and stir until all the ingredients are combined. 
7. Pour into the prepared pan and smooth the top. Bake for about 45 -55 minutes, or until a toothpick inserted in the center of the loaf comes out clean.

Chocolate Cake - Orders (2013)


Baked on 15 May 2013

Thanks to Liz for ordering this Chocolate cake from me for a colleague who was leaving the company. Hope she likes the cake.


Baked on 17 May 2013

Baked this Chocolate Oreo Biscuits Cake for a gathering at a friend's house. Making it as colorful and chocolaty for the kids and glad that they love it!

Vanilla & Chocolate layers Sponge Cake with Peach toppings & Sponge Fingers


Baked on 11 May 2013 for Mother's Day Celebration

I was tasked to bake a cake for our extended Family Mother's Day Celebration and I thought of something with fruits would be more well-liked by all Mothers. 

So I decided to bake this Vanilla & Chocolate layers Sponge Cake with Peach toppings, cream cheese frosting for creaming the cake and decorated the sides with sponge fingers. The finished cake looked so gorgeous! Everyone loved the cake and within seconds, the whole cake was gone. 

I was really happy to receive all the compliments for this cake, indeed a great project for me, yippee!

Cake In A Jar

Baked this on 11 May 2013

I have decided to create my own "Cake in A Jar" after I came across an interesting shop that sells this (they have different cake & cream content in it). I think this could be a great gift for close friends as it's very presentable and perhaps adding a little personal touch with their name on it would be even perfect!

I baked a Chocolate Sponge Cake and placed small parts of cake (press down a little) in the jar between a layer of Cream Cheese frosting. I also threw in some chocolate flakes on the last layer of cream cheese frosting, so as to add a little more chocolaty taste to the cake.

I kept this "Cake in A Jar" in the fridge since there was cream cheese content in it. Amazingly, the cake was still very spongy and soft even after 2 days. 

Give it a try and let your creative juice run wild on & in the jar.

God's Calling

It had been quite a while that I have not updated my blog as I have been very busy lately sorting out my new career path. I guess this could be God's calling for me to start working on the dream that I had all along and I am going to give it a shot :)

You will be seeing alot of my bakes updates coming up soon!

Saturday, May 4, 2013

Cavan's 11th Birthday on 5 May 2013

Celebrating Cavan's 11th Birthday with Mummy's special made mini cupcakes, brownies, fruit tarts and a Lego M&M cake.

Sunday, April 28, 2013

Mini Mixed Fruits & Chocolate Chips Muffins


This past week was indeed a very busy week for me and I didn't got the chance to plan what to bake for the weekends. I have a quick look at some recipes in the blog and came across this recipe (from Happy Home Baking) which I could use up my mixed fruits and chocolate chips in my fridge. However, I decided to make some changes to the recipe. The recipe called for raisins but I replaced raisins with mixed fruits. I soaked them in hot water and drained dry so they will be soft in the cake. I added the mixed fruits only after I poured the liquid mixture to the dry mixture. I have also reduced the sugar further from original 150g to 100g as I felt the flavoured chocolate chips would be sweeter than dark chocolate. 

I have made 2 attempts in preparing the liquid mixture (for direction no. 5) as the first attempt, the mixture was lumpy and did not look right to me. In my 2nd attempt, I melted the butter and cool a little. Then I stirred in the sugar first, followed by adding the milk and stirring a little. Lastly, I added the egg and mixed it well. The consistent looked more convincing this round. 

The texture was soft and the sweetness was just right. The mixed fruits and chocolate chips compliment each other well in these muffins. Perhaps, the next time I will add my favourite walnuts to have a little crunch to the muffins.

Ingredients

250g plain flour
1 1/2 tsp baking powder
1/2 tsp baking soda
80g chocolate chips
150g mixed fruits
1 egg (lightly beaten)
60g butter
175ml milk
100g sugar (reduced from 150g)

Directions

1. Pre-heat oven to 180 deg C.
2. Soaked mixed fruits in hot water for 20mins, drained and dry with kitchen towel, set aside.
3. Melt butter in a saucepan, over low heat, set aside to cool.
4. Sieve together flour, baking powder and baking soda into a mixing bowl.
5.Add chocolate chips and mix with a spatula. Make a well in the centre.
6. Add sugar to the melted butter and stir. Follow by adding milk and mix. Lastly add egg and mix until thoroughly combined.
7. Pour the liquid mixture into the flour and add mixed fruits. With the spatula, gently fold all the ingredients to form a wet batter. Just mix until the flour are incorporate into the batter. DO NOT Over mix.
8. Spoon batter into paper muffin cups. Bake for 20-25mins.
9. Let cool on a wire rack.

Saturday, April 20, 2013

Chocolate Cake/Cupcakes (2)


When I first saw this recipe, I really liked the looks of the chocolate cupcakes with the spongy texture and so I decided to give it a try. Indeed, it was really exactly how they were as in the picture. Amazingly, this recipe does not use any oil or butter and no folding required as well but yet still can yield such a soft & spongy texture. 

Initially, I planned to bake a Birthday Cake (with Classic Sponge Cake) for my maid's birthday but after trying out these chocolate cupcakes, I have changed my mind to use this recipe instead. I also used another good recipe to do the ganache to coat the cake and an exclusive Birthday Cake was created. My maid was very surprised and happy that I made this chocolate cake (even though she knows that I don't like chocolate) for her.

Ingredients

2 eggs (room temperature)
1 egg yolk (room temperature)
55g sugar
a little salt

36g milk
50g self raising flour
10g cocoa powder

Ganache (for cake)
75g whipping cream (I used Enborg)
150g couverture dark chocolate
20g butter

Directions

1. Preheat oven at 170 deg C.
2. Whisk eggs and egg yolk, sugar and salt till pale and ribbon stage.
3. Add milk, follow by flour and cocoa powder until just combined. Do not over beat.
4.Fill the cupfillers 3/4 full and bake for 15mins.

Ganache For Cake : Cook whipping cream till boil. Add dark chocolate, stir until completely melts. Add in butter, mix until well combined. Leave aside to cool and spread over cake. Decorate cake and keep ready cake in the fridge.

Sunday, April 14, 2013

Chocolate Cupcakes

I was so attracted to the colourful fillers when I saw this recipe from Nasi Lemak Lover. I have bought some colourful fillers from BIY and could not wait to try them. However, the result was not up to my expectation. The fillers did not look bright after baking. Nevertheless, my kids enjoyed the cupcakes, not bothering by the colour of the fillers at all. I felt the texture was soft but too chocolaty for me.


Ingredients

125g butter
80g sugar
3 eggs
115g cake flour
20g cocoa powder
1 tsp baking powder
4 tbsp yoghurt

Directions

1. Line cupcake fillers on cake pan and preheat oven 180 deg C.
2. Sift flour, cocoa powder and baking powder.
3. Beat butter and sugar till fluffy and pale.
4. Add in egg one at a time, mix well.
5. Add in flour and yoghurt alternately.
6. Spoon batter into fillers, sprinkle chocolate rice on top.
7. Bake at 180 deg C for 20-25 mins.

Vanilla Almond Cupcakes


My colleague keeps reminding me to make almond cakes for her as she is one great lover of almond and I found this recipe that she might like it. The recipe said its light but I felt that it is quite a heavy cake (like pound cake type which my son likes). I like the almond meal in the cake and the crispy almond flakes when they are out of the oven but not sure if the texture will still be nice & soft the next day. Will get her to comment on it.

Ingredients

2 eggs (large)
80g sugar
A pinch of salt
1 tsp vanilla extract
50g almond powder
80g cake flour
2/3 tsp baking powder
70g melted butter
35g sliced almond

Directions

1. Preheat the oven to 170 deg C.
2. Line the tins with paper fillers.
3. Sift the flour and baking powder together, set aside
4. Whisk the eggs, salt and vanilla extract until lighten add the sugar gradually until very light in colour.
5. Add the almond powder and flour into the eggs mixture.
6. Fold in the melted butter.
7. Spoon into prepared tins, and sprinkle with sliced almonds.
8. Bake for 20-25mins, or until cake spring back when touched lightly.

Sunday, April 7, 2013

Mini Oreo Cheese Cupcakes

I decided to give this Oreo Cheesecake a try when I saw the recipe from Happy Home Baking. Happy Homemaker used the larger Oreo cookies, placed them at the base of the fillers and serve it upside down. I thought this is a brilliant idea but I decided to try with mini oreo cookies instead (for bite size). I tried placing the mini oreo cookies at the base of my fillers, nevertheless the fillers were much too big than the mini oreo cookies and it will not be pretty when I turn it over. So I had no choice but to place the mini oreo cookies on top instead. Still, it looked presentable.

Ingredients

35 mini Oreo Cookies (8pcs remove cream and coarsely chopped)
225g cream cheese
40g caster sugar (I reduced from 50g)
1/2 tsp vanilla extract
Place mini oreo cookies on top of batter
1 large egg (lightly beaten)
60g plain yoghurt

Directions

1. Preheat oven at 135 deg C.
2. Beat cream cheese with an electric mixer until smooth.
3. Add in sugar, beat until just combined and then add vanilla extract.
4. Gradually drizzle in the egg, beat to combine.
5. Add in yoghurt, beat till just combined and mix in chopped cookies.
6. Fill each muffin fillers almost to the brim. Place mini oreo cookies on top of batter. Bake for 20-25mins until filling is set and not jiggly. Transfer to wire rack, leave to cool completely. Store in airtight containers and leave to refrigerate at least 4 hrs or overnight.

Saturday, April 6, 2013

Orange Sponge Cupcakes


I came across a recipe book recently that designed cupcakes with beautiful patterns on them before steaming and I was curious whether it could apply to baking as well. When I saw this Orange Sponge Cupcake recipe with the flat top, I immediately knew that I could do the experiment with this. I used melting chocolate to pipe some patterns on top of batter to see if the chocolate would still stay after baking and it really did! I would say this is indeed an easy recipe with a perfect nice top to play with designs. The texture was soft, however we could add in some orange zest to better enhance the orange flavor.

Decorate with melting chocolate on top of batter before baking

Ingredients

3 eggs
50g sugar
60g cake flour
18g orange Juice
18g corn oil
some melting chocolate for decorating

Directions

1. Whisk egg and sugar till ribbon stage.
2. Add in sifted flour and mix until just combined.
3. Mix corn oil and orange juice together. Add into the batter in 2 additions and mix until just combined (do not over beat). Scoop the batter into cup fillers till 3/4 full.
4. Melt chocolate in microwave and put into a piping bag. Pipe designs on top of batter.
6. Bake at 180 deg C for 20-25mins.

Corn Chicken Soup


My family love this soup very much as it was delicious with the sweetness from the corn and the well combination with chicken meat. The egg shreds also added a beautiful look to the soup. 

I am submitting this post to Little Thumbs Up for April  2013 event with the theme on "Corn" organised by Zoe (Bake for Happy Kids) and Mui Mui (My Little Favourite DIY) and hosted by Esther (Copycake Kitchen).

Ingredients

200g chicken breast meat
1 cube chicken Knorr
1/2 can kennel corn
1 tbsp corn flour (mix with 3 tbsp water)
1 egg
some spring onions
pepper & salt

Directions

1. Rinse chicken breast and cut int small long strips.
2. Fill pot with 1200ml of water, add in chicken cubes and bring to boil.
3. Add corn and stir well, then add chicken.
4. Add cornflour mixture and stir gently to thicken.
5. Beat eggs and mix well with 2 tbsp water, slowly pour into soup till egg separate into shreds on the surface and turn off heat.
6. Sprinkle spring onions, pepper and salt before serving.