BeautyMe Love Recipes

BeautyMe Love Recipes

Saturday, January 25, 2014

German Cookies - CNY Orders (2014)

Specially packed German Cookies for my customer as gifts for her colleagues. Thanks for giving me this opportunity to test out my creativity. Very happy with the final products and great satisfaction with my customer's compliment!  

Saturday, January 18, 2014

CNY Orders (CNY 2014)

It's time of the year again busy baking all the CNY orders. With past experience, I am able to plan my time well to spread out the production this year. 
Hope all my customers enjoyed my bakes. 


Sunday, January 5, 2014

Orange Pound Cupcakes

I have been longing to bake this Orange Pound Cake and so while baking the cookies, I made an effort to bake this Orange Pound Cakes for the kids and my colleagues. I knew my son will love this cake and indeed he gobbled up 2 pcs and asked for more. Too bad, have to keep the rest for my colleagues.

An excellent recipe but I felt the sugar quantity quite alot so I reduced from 200g to 180g but I still felt a little sweet, guess best to reduce further to 170g if you prefer less sweet. 

* Note : You can used 8 inch round pan to bake a whole cake. I preferred cupcakes, easier                     to give my colleagues.
Baked on 16 Feb 2014

Ingredients

200g butter
170g sugar (reduced from 200g)
200g plain flour + 1 tsp baking powder
4 eggs
60g orange juice
zest from 1 orange
1 tsp vanilla extract

Directions

1.Preheat oven at 180 deg C.
2.Cream butter with sugar until light and fluffy.
3. Beat in eggs, one by one beating well after each addition.
4.Add in vanilla and beat a while.
5. Sift flour with baking powder and put half the flour in. Beat until no lumps are seen.
6.Add in orange juices and mix till combined. Add in balance of flour and zest and combine until smooth.
7. Scoop batter into cup fillers and level it.
8. Bake for 30-40 mins until golden, or unitl a skewer comes out clean.

Cookies Production Commencement Day!


Today is Cookies production commencement day for CNY! More to come next few weeks. Really enjoying this baking moments as I have been quite slack, have not been baking that frequent lately. Thanks to all the great supporters for your orders :)   

Pumpkin Cake

Baked on 29 Dec 2013
I could not bear to see my Mother-In-Law watched us enjoying the Christmas Fruit Cakes because she could not eat due to her diabetic condition, so I baked her a healthy pumpkin cake. Very glad that she ate with thumbs up and with total enjoyment while we have ours too!  

Christmas Fruit Cakes

Baked on 29 Dec 2013

How could we not have Christmas Fruit Cakes during Christmas! With pressing time for other activities and even though Christmas is over, I still decided to bake my favorite cakes for my family and colleagues. Glad that everyone loves it as much as I do :) ! 

Xmas Cupcakes


       Baked on 23 Nov 2013                                              Presented my Cupcakes on Cake Tiers

Office Christmas Party 24 Dec 2013

I was tasked to organize our office Christmas Party on 24 Dec 2013 and so I decided to showcase my cupcakes to my colleagues. I used my favorite Chocolate Cake recipe and used a special frosty whip for the toppings (just add water to the powdery mix). I bought the Christmas Chocolate Tree which added perfection to the cupcakes. 

Though busy getting all the different food for 100 pax but it was a great opportunity to showcase my buffet setup. I really felt great satisfaction seeing my colleagues tasting my bakes with great smiles and compliments. A strong drive and motivation to do more bakes for them.      

Blueberry Chocolate Cupcakes

Baked on 17 November 2013
Baked these Blueberry Chocolate Cupcakes for my colleagues before I went for my holiday trip to Taiwan so they don't miss my bakes. 

Using Chocolate cake recipe with blueberry filing and butter cream topping (icing sugar+butter+milk). Felt the butter cream not so stable and pattern not very visible. Still preferred whipping cream.

Holiday Break :)


Wow, it had been a long while since I last updated my blog as there were so many activities from Nov - Dec 2013 for me. Starting from the preparation for our trip to Taiwan (22-28 Nov 2013) and organizing Christmas Party for my company, all really kept me so excited and occupied. Indeed a good break and a fulfilling experience to complete the year 2013!

So you will get to see a numbers of updates on my bakes coming up! 

Saturday, November 16, 2013

Apple Tart


Finally, I baked this apple tart for my son who has been bugging me for a long time. However, I have never liked the sourness from green apples so I replaced them with red apples instead. Surprisingly, it tasted fantastic with a strong apple aroma and my kids love it. There are quite a number of steps to complete this apple tart but it was really rewarding with the final product and big smiles on everyone's faces.

Ingredients

Pastry Crust
100g sugar
1 egg
175g butter
350g plain flour

Apple Puree
2-3 red apples (peeled and cut into very small pieces)
2 tbsp sugar
4 tbsp water
1 tsp vanilla extract
10g butter

Almond cream 
75g butter
45g caster sugar
60g ground almond
2 tsp plain flour
1 tsp cornflour
1 beaten egg
1 tsp vanilla extract

Apple Toppings
2-3 red apples (peeled and cut into thin slices)
15g butter, melted
1 tbsp sugar

Directions

Pastry Crust
1.Preheat oven at 180 deg C.
2.Place sugar, egg and butter in mixer and beat until sugar is just dissolved. Add sifted plain flour and mix until dough holds together. Keep in fridge for 15 mins. Press dough evenly to springform tart pan and prick the base with a fork.
3.Blind bake at 180 deg C for 15 mins , then remove and let cool. 

Apple Puree
1.Combine cut apples, sugar and water in a small pot. Cook the mixture for about 10 mins till soft. Stir in vanilla extract and 10g butter. Whisk mixture lightly to mash up the apples. Set aside.

Almond Cream
1.Cream butter and sugar lightly. Add ground almond and mix to combine.
2.Add flour and cornstarch, mix, then add beaten egg and vanilla extract. Mix well.

Assembly
1.Spread almond cream evenly onto the half baked tart shell.
2.Spread apple puree over the almond cream.
3.Arrange apple slices on top of apple puree. Brush with melted butter and sprinkle with sugar.
4. Bake at 170 deg C for 40-50 mins. 

Monday, October 14, 2013

Non-Bake Strawberry Jelly Cheesecake

I came across this recipe from Ikea magazine (by Felicia Khoo from Palate Sensations) and found the steps much easier than the one I used to make with no cooking of cream cheese and Nestle cream required. However, I felt the quantity of digestive biscuits used in this recipe a little too much so I will reduce it to 200g the next time I make it. The other thing to take note is that the Jelly mixture was too much even though I modified from 250g (original recipe) to 220g of hot and cold water. I have further reduce the water to 200g in this recipe.

As I used a round baking tin to do this cheesecake, I worried that I might have difficulty getting it out later, so I placed a baking paper across the base of tin and long enough for me to lift the cheesecake out.     

I like the texture of this cheesecake where the cream cheese does not taste creamy and you will not get sick of it after 2nd serving. I am glad that the kids love this cheesecakes as much as I do.  

Ingredients

200g digestive bisciuits
100g melted butter

1 block Philadephia cream cheese
50g sugar
1/2 tsp vanilla essence

10g gelatine powder
1/2 cup hot water

1 box Strawberry Jello
200g boiling hot water
200g cold water

Directions

1.Crumble the biscuits and mix it together with the butter.
2.Press the mixture into a round tin to form the base.
3.Mix cream cheese, sugar and vanilla essence together until it becomes a smooth texture.
4.In a separate bowl, sprinkle the gelatine powder over the hot water and mix well.
5.Add it to cream cheese mixture and thin it down.
6.Pour mixture into the tin with biscuit base.
7.Chill the mixture in the fridge for a while and decorate with strawberries. Let it set for 3 hours.
8.Melt Jello powder in boiling water until dissolve and add in cold water. Use a large table spoon, gently pour over the cheese layer and set it in the fridge for another few hours.   

Sunday, September 22, 2013

Soya Agar Agar Mooncakes


I was really amazed when I saw my ex-colleague, Liz did these Agar Agar Mooncakes and excitedly wanted to make it myself even though the Festival has been over. 

My first attempt failed when the Soya Milk skin turned out very soft and also it was difficult to get it out from the mould. With my 2nd attempt, I decided to increase the Agar Agar powder from 2 tsp to 4 tsp and this time, it turned out excellent. They could also be taken out from the mould effortlessly. The taste was indeed wonderful, not sweet with the light soya flavour and the cooling sensation made it a wonderful dessert for on a hot afternoon. Thanks to Liz and Rachel for this recipe.

Ingredients

Grass Jelly Filling
250g water
31/2 tbsp sugar
1 tsp Agar Agar powder
2 Pandan leaves
100g Grass Jelly (unsweetended), cut to strips

Soya Milk Mixture
500g Nutri Soy Soya Milk 
125g fresh milk
45g sugar
4 tsp Agar Agar powder 

* Egg Yolk (optional)
250ml carrot juice 
2.5 tsp Agar Agar Powder 
Bring to boil and set in balls ice cube tray.

Directions

1. For making grass agar agar filling-use round plastic cup that is smalller than the jelly mould.
2. Boil sugar, water, agar agar powder and pandan leaves together in a pot at medium heat.
3. Keep stirring mixture until liquid boiled. Discard pandan leaves and off heat. Add grass jelly strips into it, stir well with a spoon for another minute.
4. Pour grass jelly filing into plastic cups evenly (add in Egg yolk in the middle) and leave to set in fridge for about 15mins.
5. For Soya Milk mixture-mix all ingredients in a pot, bring to boil at medium heat.
6. Keep stirring during the process so that it will not be burnt (until the mixture is thicken a little, on low heat) and off heat to stir for another few minutes.
7. Pour some soya milk mixture into moulds until half full. Gently scratch set grass jelly filling with a sharp knife. This will make the agar agar jellies stick together.
8. Place 1 pc of grass jelly filling in each mould, then fill up with soya milk mixture until full.
9. Cool and chill jelly mooncakes to set in the fridge.

Saturday, September 14, 2013

Snowkin Mooncakes 2013


Mooncakes specially made for special group of people.

Mooncakes (Orders 2013)


It's time of the year to make Snow Skin Mooncakes again. Very thankful to all my friends and relatives for their orders and hope that they will enjoy all these mooncakes I made.

"Happy Mid Autumn Festival" 

Sunday, September 8, 2013

Pork Floss Layer Cake


I wanted to try out this recipe as it seemed interesting to combine salty ingredients to sweet cake. The unique combination of taste was indeed fantastic and well-liked by everyone. 

Ingredients

(A)
4 egg yolks
15g sugar
60g milk
40g oil
80g cake flour
20g corn flour

(B)
4 egg white
40g sugar

Directions

1.Beat egg yolks with sugar. Add in oil and milk followed by flour and mix until a smooth consistency is achieved. Set it aside.
2.In a grease free bowl, beat egg white until frothy. Add in sugar in 3 batches. Beat until soft peak.
3.Fold the egg white mixture into yolk batter in 3 portions, doing it very gently and slowly taking care not to deflate the egg white.
4. Pour the batter into swiss roll pan and smoothen the batter.
5.Sprinkle pork floss on top of cake.
6.Bake in preheated oven at 180 Deg C for 12-15 mins.
7. Holding onto the baking paper, pull the cake out of the pan onto a cooling rack immediately. Peel down the sides of the baking paper carefully to let the heat dissipate.
8.When cake has completely cooled down, cut the cake into small pieces.

Chicken Baked Rice & Salad


Prepared this sumptuous Chicken Baked Rice with Salad for lunch today for MIL & kids. They just cannot resist this delicious meal.

Sunday, August 25, 2013

Cotton Cheese Cake

This is my 2nd attempt to bake cotton cheese cake and when I saw this recipe, I thought it was straight forward but still it wasn't up to my expectation. I found the folding method really tricky and I still cannot master the technique. Guess I will need more practice to perfect my skills.

Ingredients

(A) 
160g cream cheese
24g butter
120 milk

(B)
40g flour
30g corn flour

(C)
4 yolks

(D) 
4 whites
1/8 tsp cream of tartar
80g sugar
pinch of salt

Directions

1.Preheat oven at 160 deg C.
2.Grease and lined bottom pan.
3.Place (A) in mixing bowl and whisk until thick.
4.Add (B) and mix until combined. Then Add (C) and mix until well blended.
5.Whip the egg whites in (D) ingredients. Continue whipping until soft peak. Add it into the cheese mixture from step (4). Mix until well incorporated.
6.Pour cheese filing onto the prepared pans. Baked in water bath for about 40-45 mins or until firm and golden brown.
7. Remove cake from oven.
8. Remove cake from mould immediately. Set aside to cool.

Sunday, August 11, 2013

Souffle Cheese Cupcakes with Marshallows

My youngest girl has pestered me to buy the tiny marshmallows and the idea of topping them on these cheesecakes came to my mind straight away. As these cottony cheesecakes usually shrink after baking, topping it with these marshmallows made the overall presentation more colorful. Guess this will be well received by kids.

Ingredients

125g cream cheese
60ml fresh milk
40ml corn oil
3 egg yolk
20g caster sugar
20g lemon juice
30g corn flour
3 egg white
50g castor sugar
Melting chocolate
Tiny marshmallows

Directions

1.Preheat oven at 150 deg C.
2.Use double boiled method, stir cream cheese and milk till well mixed. Add corn oil and mix till smooth.
3.Beat egg yolk and sugar till thicken and pour in lemon juice.
4.Add egg mixture into cream cheese mixture and mix well. Add in corn flour and mix till not lumpy.
5.In another bowl, with an electric mixer, whisk egg white, adding sugar in few portions and whisk till stiff.
6.Add 1/3 of the egg white mixture into the cheese mixture and mix. Then pour the mixture back into the balance egg white mixture and fold in with spatula till just combined.
7.Fill cups to 3/4 full and bake in water bath at 150 deg C for about 40 mins or until golden brown.
8. Once cool, add some melted chocolate and top with marshmallows.
* It is normal for the cheesecakes to shrink a little after baking.

Saturday, August 10, 2013

Blueberry Baby Cheesecakes


So far, I have never used sour cream in my baking before, so when I saw this recipe, I was very excited to try it. Amazingly, they tasted like cheesecakes with the sour cream. The cakes were very soft and the toppings with the blueberries made it an excellent combination. 

One important tip to note, is not to fill too much batter into the muffin fillers (slightly less than half) or the cake will rise too high, leaving no space for the toppings. 

Ingredients

100g butter
100g caster sugar
2 large eggs (lightly beaten)
zest & juice from lemon (qty base on own preference)
140g self raising flour (sifted)
Blueberries

For toppings
250ml sour cream
25g icing sugar
1 large egg
1 tsp vanilla essence

Directions

1. Preheat oven at 180 deg C and line muffin pan with muffin fillers.
2. Cream butter and sugar until fluffy. Add in eggs gradually and beat until smooth. Add in lemon juice and zest and mix well.
3. Add flour into butter mixture and mix until smooth.
4. Spoon a little batter into fillers and push blueberries into each cup. Top with some batter and level it (pls ensure batter not exceeding half cup as the cake will rise till 3/4 cup, leaving some space for topping).
5. Bake cake for 13-15 mins or until cake is done (doesn't need to be golden).
6. Meanwhile, mix topping ingredients together until smooth. 
7. Remove cakes from oven and spoon topping over. Top with more blueberries.
8. Bake for another 5-7 mins until topping is set. 

Sunday, August 4, 2013

Looking for the 50th follower

Hi Bloggers,

Warm welcome for those who have joined or just joined as followers to my blog. Really appreciate your support and great comments. I am looking forward to meet my target of 50 followers by the end of 2013. The 50th follower will get to receive a mystery gift from BeautyMe Love Recipes. 

I hope you will have many hours of enjoyment in baking. Meanwhile, I will continue to find good recipes to add to my collection in my blog. 

Happy Baking!  
BeautyMe Love Recipes

Orange Cranberry Cupcakes

Baked these Orange Cranberry Cupcakes for Teacher's Day


I found this recipe so similar to my Orange Sponge Cupcakes that I did before. The only difference for this recipe is that the cake has a nice dome and texture really soft and spongy. I wanted to explore if cranberries would taste nice with the cupcakes and miraculously it tasted wonderful. The sweetness of the cake and the slight sourness from cranberries made it a perfect match. I love these cupcakes and so do everyone in the family. 

Ingredients

50g corn oil
70g fresh squeeze orange juices
6 eggs (cold from fridge)
190g caster sugar
200g cake flour
100g dried cranberries

Directions

1. Mix corn oil and orange juices together, set aside.
2. Sift flour and salt together, set aside
3. Remove eggs from fridge and add into mixer bowl. Then add in caster sugar and whisk (use Balloon Whisk) speed 4 for 5 mins till pale and fluffy.
4. Add in flour spoon by spoon and mix well.
5. Add in corn oil + orange juices and use a spatula to fold the batter till well combined. Do not over mix. 
6. Pour batter till half filled, add cranberries and top with more batter until 90% full. Slightly tap on countertop twice to remove air bubbles. 
7. Bake at pre-heated oven at 170 Deg C for 20mins or until lightly golden brown.

* Note: for waxy fillers 6cm (diameter) X 3.5cm (height), 30g each, 27pcs.

Sunday, July 28, 2013

Soft Blueberry Cupcakes


My son has been bugging me to make his favorite blueberry cupcakes and I thought of trying a different recipe. Not sure why this recipe called for brown sugar but I felt the color were too brown inside. Perhaps I will try with white sugar the next time. The cupcakes indeed were much softer than the usual ones I made and my son likes it alot. 

Ingredients

100g butter (softened)
100g brown sugar
2 large eggs (lightly beaten)
zest and juice from 1/2 lemon
140g self raising flour (sifted)
Blueberries

Directions

1. Preheat oven at 180 Deg C and line muffin pan with fillers. 
2. Cream butter and brown sugar until fluffy. Add in eggs gradually and beat until smooth. Add in lemon juice and zest and mix well.
3. Add flour into the butter mixture and mix until smooth.
4. Fill the fillers with 1/2 batter and push blueberries into batter. Top with batter (up to 3/4) and level it. Add a few more blueberries on top.
5. Bake at 180 Deg C for 15 mins or until a toothpick inserted and comes out clean.

Sunday, July 21, 2013

Rainbow Tang Yuan (彩红汤圆)

With so much of red bean paste left, I decided to make these Rainbow Tang Yuan (彩红汤圆). I just needed to buy a packet of glutinous rice flour and added all my favorite coloring to it. So happy to see everyone eating it with a cheery smile on their faces.  

Ingredients

115g glutinous rice flour 
100ml water
Red bean paste

Ginger Syrup
3 cups of water
2 slices of ginger
Rock sugar to taste

Directions

1. Mix the glutinous rice flour with water in a bowl until it forms a smooth paste and no longer sticks to your hand. 
2. Divide dough into 3 portions and mix in colorings as desired. 
3. Roll dough and red bean paste into small balls
4. Flatten a dough ball using your palm and place a red bean ball in the center. Fold the edges to seal tight and gently roll the dough using your palm. Dust with some flour if it sticks to your hand and place dough on a piece of parchment paper.
5. Prepare ginger syrup by boiling water. Add the ginger into the water and boil for 10-15 mins. Add rock sugar (to taste) and boil for another 5 mins. Lower heat to simmer.
6. Heat up another pot of water and bring it to boil. Drop the dough into the boiling water. As soon as they float to the top, transfer them out and into the ginger syrup. Turn off the heat and ready to serve.

Saturday, July 20, 2013

Red Bean Pastry (红豆酥)


I had this plan to make Red Bean Bun (豆沙包) with the red bean paste that I bought but when I saw the ready made puff pastry in my freezer, I decided to make this quick snack, Red Bean Pastry (红豆酥) instead. Surprisingly, everyone in the family love this snack and kept asking for more. A simple and easy snack that can make anytime.


Ingredients

Store bought Puff Pastry
Red bean paste
White sesame seeds
1 beaten egg, for brushing

Directions

1. Take puff pastry out from freezer and place a sheet of pastry on board. Slice pastry into 3 long parts and 1/2 each long parts to form a rectangular (you can cut the pastry according to your preference sizes).
2. Place base pastry on a baking sheet and spread red bean paste. Cover the top with the other 1/2 rectangular pastry.
3. Press edges of pastry together with a fork. 
4. Brush the top of the puff with some egg wash. Sprinkle the white sesame seeds on the top and bake at 180 deg C for 25 mins or until golden brown. 

Sunday, July 14, 2013

Apple Pie


I found this recipe from a book "The Worry-Free Bakery". Instead of making the dough as instructed, I used the store bought puff pastry which really saved me alot of work and time to make the dough. Just then when we were about to eat the apple pie, we heard the ice cream man coming and without hesitation, we went to get the 3 different flavors (Raspberry, Sweet Corn and Chocolate). Oh my godness, the pie was equally crispy and the ice cream really compliment the apple pie. Yummy!

Ingredients

Store bought Puff Pastry
2 red apples 
4 tbsp sugar
2 tsp cinnamon
1 beaten egg, for brushing

Directions

1. Peel apples, then slice into thin wedges. Place apple slices in a microwave-safe bowl. Add sugar and cinnamon and stir. Heat for 5 mins and drain off any liquid.
2. Take puff pastry out from freezer and place a sheet of pastry on board. Slice pastry into half.
3. Line apple slices on one half of pastry (you can cut the pastry according to your preference sizes).
4. Use a knife to cut line along the centre of the other half pastry and place on top of arranged apple slices.
5. Press edges of pastry together with a fork. 
6. Brush top with beaten egg and bake at 180 deg C for 25 mins or until golden brown.

Saturday, July 13, 2013

Cake In A Cup

With the overestimated bought fruits (Strawberry, Kiwi and Peach), I decided to make this Cake In A Cup for my family. I used the Classic Sponge Cake recipe (you can use any cake recipe of your preference) for the layer cake and cut the cake into shape of heart using the cup opening. I started spreading whipped cream and added kiwi on top of the cream, following by a layer of cake and whipping cream. Finally, it was finished with some decoration of fruits on the top. 


I have failed to whip Emborg whipping cream before and this round I decided to give it another try. The consistency was not as stiff as Redman Whip Topping but it turned more stiff after refrigerated. The overall combination was perfect and everyone enjoyed the fruity desserts.    

Friday, July 12, 2013

Fruit Tarts - Orders 2013

Additional 2 more orders of Fruit Tarts on 12 & 13 July 2013

Mini High Tea - Orders (2013)


I am so blessed to receive an huge order for a High Tea snacks of Fruit Tarts, Egg Tarts, Brownies, Mini Cream Cheese Cupcakes and Seafood Sandwiches for a Company Grand Opening on 12 July 2013. Everything went well as planned with all the baking completed on the day before and the assembly of Fruits Tarts and sandwiches on the actual day. I am also very fortunate to have the opportunity to do the setup of my High Tea layout for the first time at the event venue. Indeed a great learning experience and I felt great accomplishment especially receiving compliment from my customer. 

Thursday, July 11, 2013

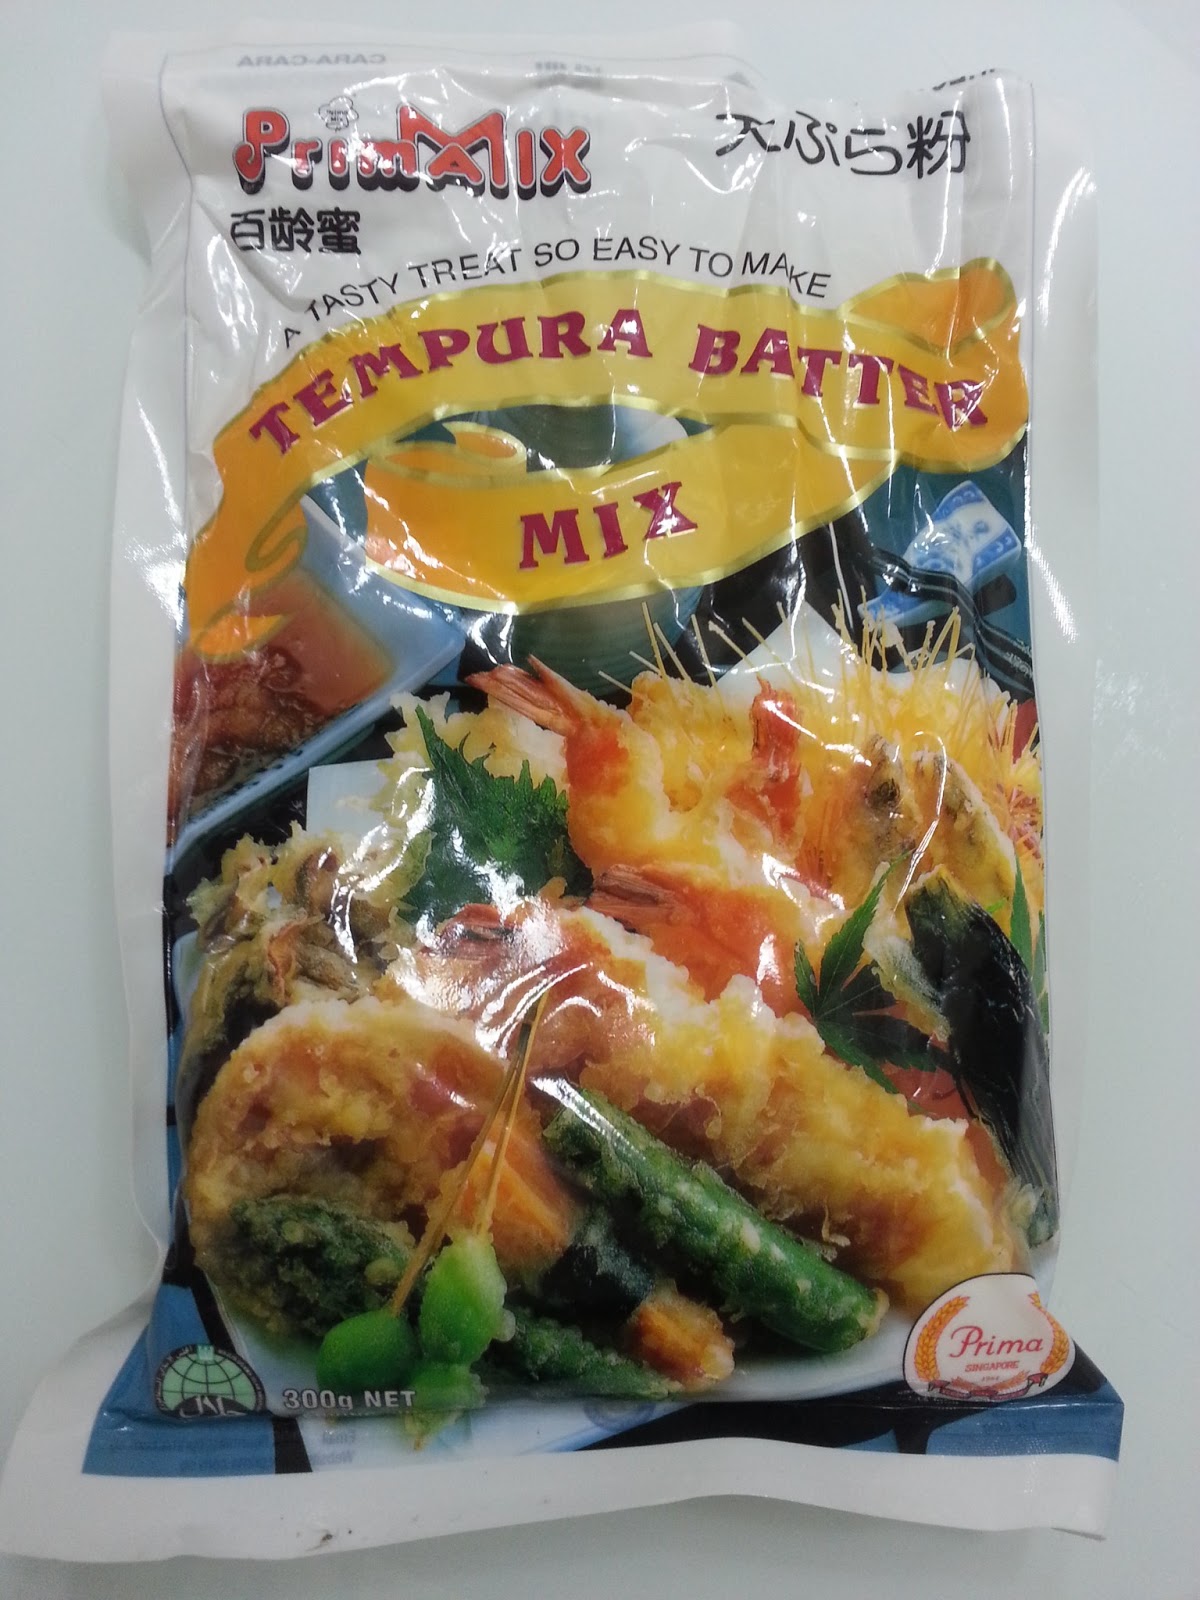
Vegetable Tempura


I always love the vegetable tempura from Japanese restaurants and this is the only method of cooking that my kids and I will eat brinjals (together with carrots & cauliflowers). I have tried coating it with egg and flour before frying but the result was not to my satisfactory. I went to supermarket one day and found this tempura batter and Teriyaki Sauce. Though the overall taste not as good as those served in Japanese Restaurants but these were very close. My kids and MIL like this dish very much but I can only allow this fried dish once in a while.