BeautyMe Love Recipes

BeautyMe Love Recipes

Tuesday, December 25, 2012

Potato Pies

December has been a very busy month for me, with some vacation overseas and preparation for Xmas parties. Finally I can find some time to sit down to do my blog writing. So you will see quite a few recipes coming up.

I decided to make this Potato Pies after my colleague, Elaine gave me the mini aluminium fillers. I made these for a gathering at my house and everyone liked the pies. It was indeed a nice bit-sized and yummy Potato Pie. 

Ingredients

Pastry Crust:
100g Sugar
1 Egg
175g Butter
350g Plain flour

Fillings:
500g or 2 packs of chicken breast/legs
1 carrot (diced)
1 large onion (diced)
1 can button mushroom (sliced)
olive oil

Marinate chicken:
3 tbsp oyster sauce
2 tsp of Knorr seasoning
2 tbsp dark soya sauce
2 tbsp sesame oil
3 tbsp Parsley flakes
some pepper
1 tbsp corn flour mix with 3 tbsp of water (to thicken the gravy)

Potato Toppings:
500-550g Potatoes (peeled, boil or microwave till cooked)
2 tbsp Soft butter
2 tbsp Whipping cream
1 Egg
1/2 tsp Salt or add to taste
Parsley flakes

Directions

Pastry Crust
1. Preheat oven to 180 degree Celsius.
2. Place sugar, egg and butter in mixer and beat until sugar is just dissolved. Add sifted plain flour and mix until dough holds together. Press dough evenly to the aluminium fillers and make some holes in the base of tarts.
3. Bake at 180 degree Celsius for 10 mins, then remove and let cool.
Fillings
4. Heat up pan with olive oil. Saute diced onion till its fragrant and soft. Add diced carrots and cook for a while. Stir in the chicken, continue to cook in medium heat. Add in mushroom slices and pour in the cornflour mixture till thicken. Taste and add more seasoning to your preference. Set aside.
Potato toppings
5. Using a fork to mash potatoes and add butter, whipping cream, egg and salt. Mix well.
6. Scoop the chicken fillings evenly into each pastry crust.
7. Fill piping bag with mashed potato and pipe onto chicken filling. Sprinkle some parsley flakes on top.
8. Bake in preheated oven at 200C for 20 mins or until light golden brown.

Sunday, December 2, 2012

Crunchy Butter Cookies


I was attracted to this cookies recipe with almond meal in it and decided to make these before going for my vacation tomorrow (3-6 Dec 2012). Indeed, these cookies were crunchy but I felt that they were not sweet enough. I will add another 20g icing sugar the next time I bake these again. 

Ingredients

105g Unsalted Butter (soften)
60g Icing Sugar (original 40g)
35g Egg
120g Plain Flour
35g Almond Meal
1g Salt

Directions

1. Whisk butter with icing sugar
2. Gradually add in egg
3. Sieve in the plain flour with almond meal till well-mixed
4. Transfer dough to piping bag with nozzle.
5. Pipe on grease-proof baking paper & bake at 180deg C for about 20 minutes.

Mini Mixed Fruit Cake

My dearest colleagues has given me this fantastic birthday present and I love it so much that I could not wait to fill my bakes on it. So I baked these Mini Mixed Fruit Cake and it just made a perfect match to the Hello Kitty cake tier tray. 

I am hesitant to add rum in this fruit cake as my kids will always be the ones finishing them, so I have replaced it with lemon juice instead. Though it did not have the taste of the usual heavy fruit cake (those with rum in it), these were soft and yummy. I will definitely bake (in a loaf) for Christmas. 

Ingredients

125g Melted Butter
40g Sugar
3 Large eggs, lightly beaten
120g Self raising flour
100g Natural yoghurt
80g Dried mixed fruit + 1 tbsp lemon juice(mix together)
1 tsp Vanilla extra

Directions

1. Mix the mixed fruit with 1 tbsp lemon juice and set aside for 30 minutes or longer.
2. In a large bowl, mix well melted butter and sugar together then add beaten eggs, natural yoghurt and vanilla extract. Mix well with a hand whisk.
3. Sieve in self raising flour, mix well and sprinkle some flour onto dried mixed fruit and fold in with a rubber spatula (do not over mix).
4. Spoon mixture to muffin cups or liners to 3/4 full and sprinkle extra mixed fruit on top.
5. Bake at preheated oven at 190C for 20-25 mins or skewer inserted into the centre comes out clean.

Sunday, November 25, 2012

Lemon Cupcakes

Wanted to try baking these Lemon Cupcakes long ago but didn't have the chance as lately very enthusiastic with steaming cakes. This is an easy recipe and it comes with lemon curd which I did not want to include as I do not like it with too much lemon taste. I felt the texture was a little dry (but my son likes it), maybe I have baked it for too long. Also, felt the butter too little (original recipe 113g) so will increase to 120g the next time I baked it again.

Ingredients

120g unsalted butter (at room temperature, cut into small pieces)
130g sugar
3 large eggs
1 tsp pure vanilla extract
Zest of 1 large lemon
60ml milk
195g plain flour
1 1/2 tsp baking powder
1/4 teaspoon salt

Directions

1. Preheat oven to 180 degrees C.
2. With an electric mixer, beat the butter and sugar until light and fluffy. Add the eggs, one at a time, beating well after each addition. Scrape down the sides of the bowl as needed. Beat in the vanilla extract and lemon zest.
3. In a separate bowl, whisk together the flour, baking powder and salt.
4. With the mixer, alternately add the flour mixture and milk, in 3 additions, beginning and ending with flour. Scrape down the sides of the bowl as needed.
5. Fill the muffin cups 3/4 with the batter and bake for about 20 - 25 minutes or until lightly browned and a toothpick inserted into a cupcake comes out clean. 6. Remove from oven and place on a wire rack to cool.

Saturday, November 24, 2012

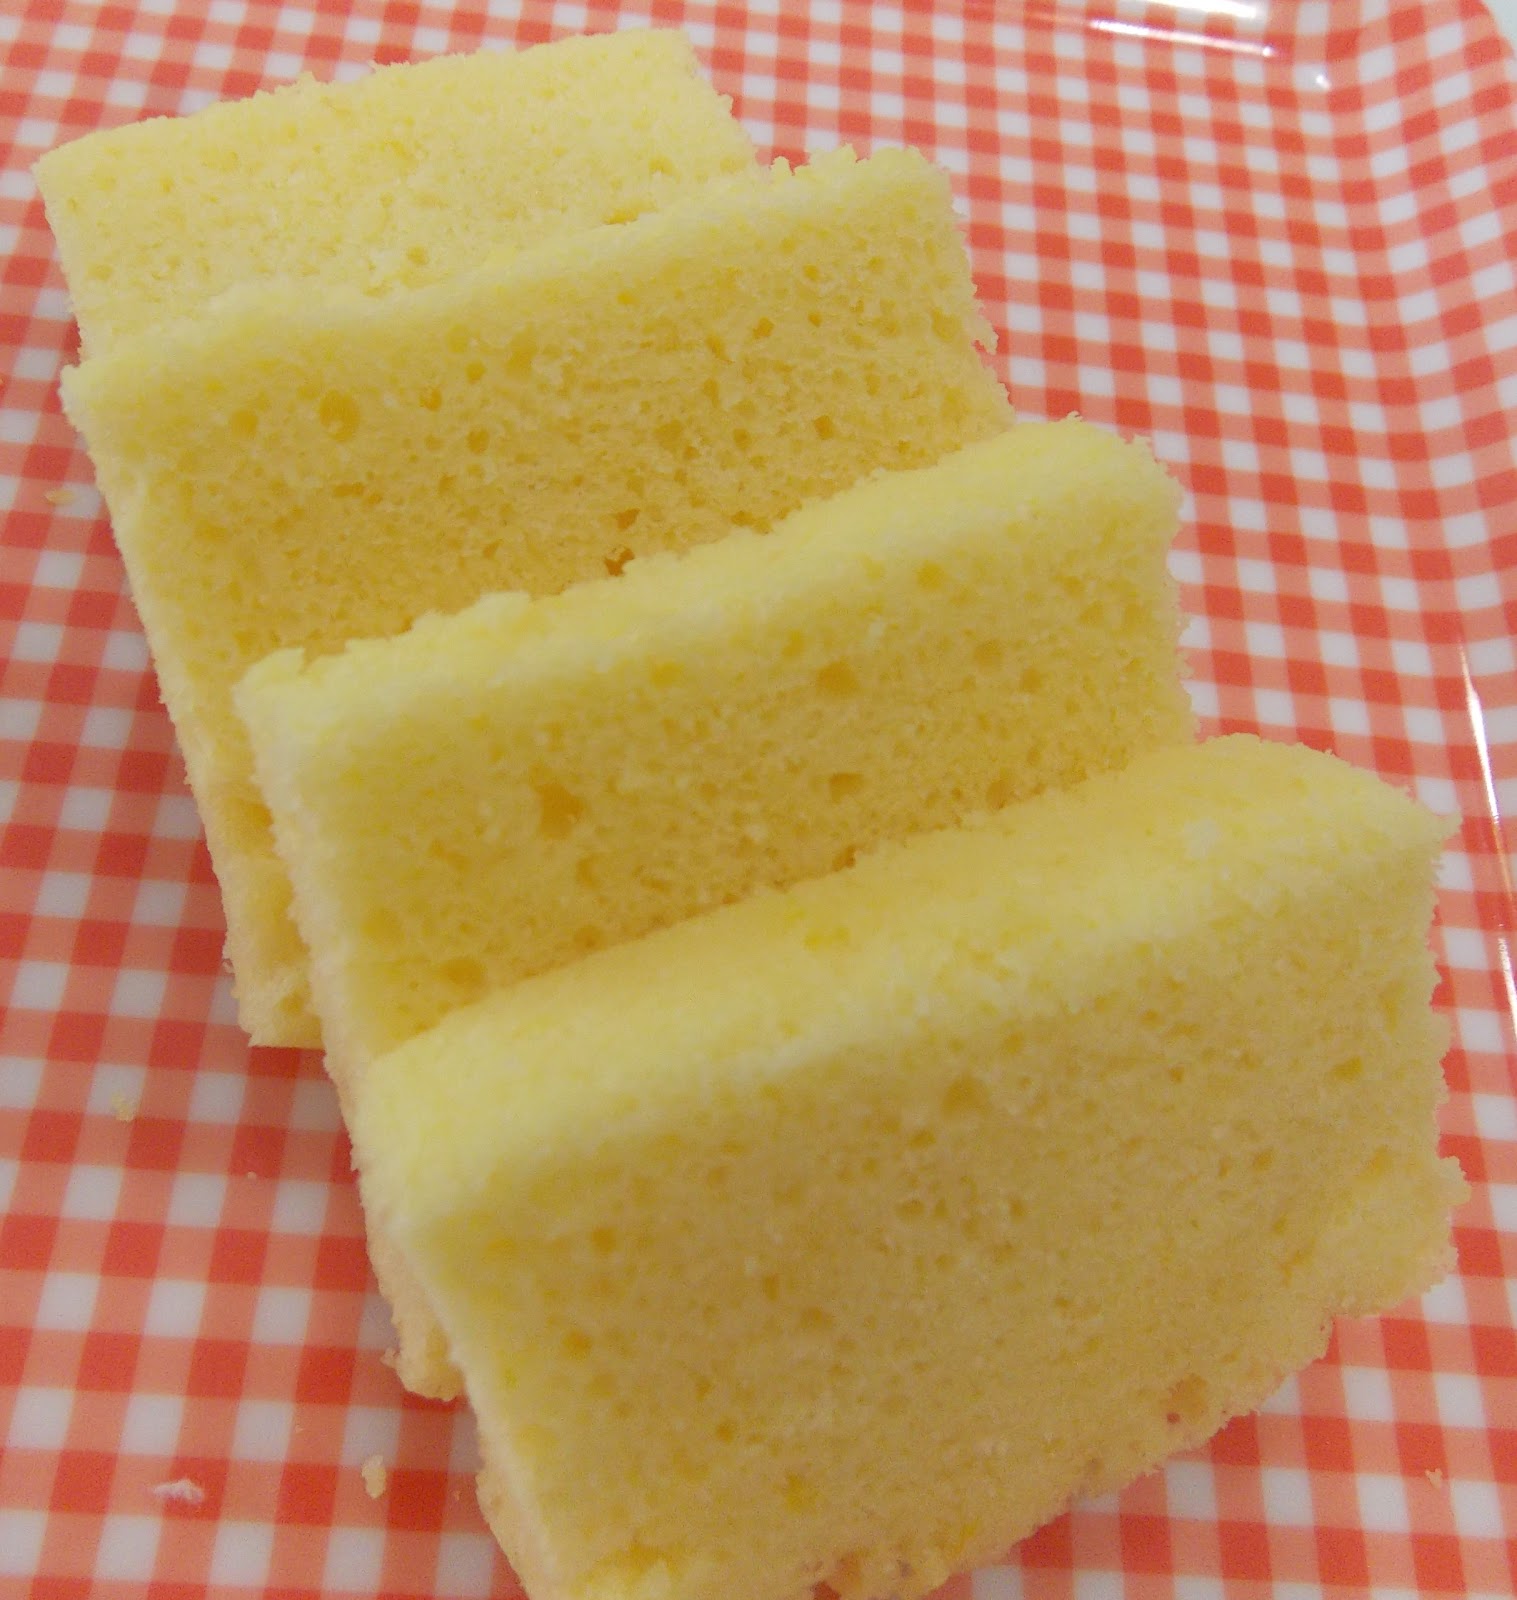
Steamed Lemon Sponge Cake

Had a holiday break to Taiwan with my eldest daughter last week and now back in action with my baking again. 

Steamed this Lemon Sponge Cake and they looked like the Steamed Egg Muffins (鸡蛋糕) I made previously. I have modified some ingredients - Egg from 250g to 270g (as equivalent to 5 large eggs) and reduced sugar from 190g to 170g (I think can reduce another 10g for those who do not like that sweet). I kind like this cake as it tasted so refreshing with the lemon in it. The texture was not as soft, perhaps the use of cake flour but I will try with self raising flour the next time I make this again.


Ingredients

270g eggs (5 large eggs)
160g sugar
180g cake flour/Self raising flour
3/4 tsp baking powder
3 Tbsp oil
3 Tbsp lemon juice
1 tsp lemon zest

Directions

1.Sift flour and baking powder. Set aside.
2. Beat eggs & sugar until ribbon stage, thick & fluffy.
3. Mix oil, lemon juice and lemon zest,and together with sifted flour,pour into egg batter.
4. Mix until just combined and only fold with spatula along the sides.
5. Pour the batter into greased baking tray or paper fillers and rest batter for 10mins before steaming.
6. Steam on high heat for 20-25mins.
7. Cool it on wire rack and slice cake to serve.

Saturday, November 10, 2012

Nutella Muffins


This recipe is really simple using Nutella for the cake as well as toppings. I have never thought of using Nutella as topping before as I felt it will not be able to spread well but surprisingly, it works so perfect like ganache & melting chocolate. You don't even have to melt or mix with other ingredients at all, its so spreadable straight from the bottle. These muffins were soft, light and not too sweet, great for a quick bake.

Ingredients

100g unsalted butter (melted)
1 large eggs
2 heaping tbsp Nutella
100ml milk
180g plain flour/self-raising flour
60g sugar
1.5tsp baking powder(omit if use self raising flour)
pinch of salt
Nutella

Directions

1. Preheat the oven to 180 deg C.
2. Combine the melted butter, egg and nutella, mix until light and creamy.
3. Add milk and mix.
4. Sift together the flour, sugar, baking powder and salt. Add to the wet mixture and mix until just combined (do not over mix).
5. Scoop batter into muffin fillers and bake for 20-25 mins.
6. Let the muffins cool completely and spread top with Nutella. Sprinkle with chopped nuts or decorative toppings of your choice.

Monday, October 29, 2012

Steamed Egg Muffins (鸡蛋糕)

Had craving for my 鸡蛋糕, made these for
breakfast (13 Jul 2014)

I am a lover of 鸡蛋糕 and was so excited when I got this recipe from my colleague, Elaine Ler. The steps indeed were simple and within 20mins, my 1st batch of muffins were out from the steamer. Gave it to my kids to try and surprisingly they loved it. These muffins were not as eggy as I thought but the texture was so soft even for the next 2 days. A great breakfast to make the night before.

Ingredients

230g self raising flour (sifted)
120ml cream soda (Schweppes non sugar)
1 tsp vanilla essence
190g sugar
4 eggs 

Directions

1. Whisk egg & sugar till pale color and add vanilla essence.
2. Add 1/3 self raising into creamed mixture and alternating with 1/3 cream soda. Repeat mixing process and stop once all well combined.
3. Pour into cup fillers 3/4 full.
4. Steam for 10mins and ready to serve when cooled.

Saturday, October 27, 2012

Best Lemon Cake

I actually don't quite fancy lemon cake but after trying a few pieces from my friend Jo, I bookmarked this recipe in my "To Do" list.   I had a strong craving to eat lemon cake and so went ahead to bake it even it was already 8pm. Without much effort, I had a slice of yummy lemon cake with a cup of hot milo. 

I have modified a few ingredients, 4 eggs (200g instead of 170g), 40ml lemon juice (instead of 20ml). The cake was soft with a gentle lemon taste and aroma. This is the best lemon cake I ever tried before.

Ingredients

250g good quality unsalted butter
185g castor sugar
4eggs whole eggs
40ml lemon juice
grated zests of 1 lemon
230g self raising flour (sift)
Almond Flakes (Optional)

Directions

1. Preheat Oven at 180 degree C and preparing baking tin (I used a 20cm X 20cm pan & a loaf pan).
2. Rubbing lemon zests into sugar until the flavour is infused into the sugar.
3. Cream the butter and infused sugar on medium high speed for about 5 minutes until pale and fluffy.
4. Add beaten eggs (lightly beat in a bowl) into the creamed butter in 6 additions and ensuring each addition is well incorporated before adding the next addition.
5. Add 1/3 of self raising flour to the egg-butter mixture until the last bit of flour is absorbed. Next, add in half the lemon juice and mix until the lemon juice is incorporated.
6. Repeat the mixing process by adding another 1/3 portion of self raising flour, followed by the remaining half of the lemon juice, lastly followed by the remaining 1/3 of the self raising flour. Scrape the sides and bottom of the bowl with a spatula to incorporate loose ingredients.
7. Pour batter into prepared baking tin. Bake for 50 mins at 180 degrees C. 

Strawberry Jelly Hearts Cheescake

This is my 2nd attempt making this Strawberry Jelly Hearts. The first time, I was too rushed to get it done and didn't wait for the cheese mixture with strawberries to be chilled enough before I poured the jelly mixture. All the strawberries started to swim in the jelly mixture. This time, I have obediently followed the instruction from Jelly Hearts Cake & Juice's recipe (advertised on Newspaper dated 8 Aug 2012) and all went well. Although it took me alot of time and patience to make these desserts, but I felt great accomplishment when I saw the final products.   

Ingredients

300g Digestive Biscuits
120g butter (melted)

250g cream cheese
10g gelatin powder
50g sugar
450ml boiling water
1 box of jelly crystal
250ml cold water
Strawberries

Directions

1. Mix  biscuits crumbs & melted butter together and press firmly with the help of a spoon onto the base of the cup. Chill for 4 hours.
2. With an electric mixer, beat cream cheese until smooth & creamy.
3. Dissolve gelatin powder and sugar with 200ml boiling water.
4. Pour gelatin solution into cream cheese mixture and mix well.
5. Scoop the cheese mixture into the biscuit base and chill for 2hours.
6. Cut strawberry into half and cut a deep V in the centre. Press each strawberry half into the cream cheese mixture. Let the strawberry sink in gently. Chill for at least 4 hours or overnight.
7. Dissolve the jelly crystal in 250ml of boiling water, followed by 250ml of cold water. Pour jelly onto the cheese mixture. Chill for 2 hrs and ready to serve. 

Friday, October 26, 2012

Steamed Chocolate Cupcakes


I was so fascinated with this cupcakes when my colleagues, Liz showed me. Since I am not a chocolate person, I just pinched a small part to have a taste of it and surprisingly, it was yummy! The cupcakes were so soft and spongy even for the next few days. The steps are simple and used steaming method. I gave these cupcakes to my kids and nephews, some like them steamed but some still prefer them baked. So it really depends on individual preferences. 

Here are some tips about steam cakes that I got from the experts:
1) Remember to beat the eggs + sugar very well. And by that, it means more than 10 mins of high speed whipping.
2) Heat up your steamer before putting the batter - filled moulds in.
3) Do not open the steamer halfway through the steaming process.
4) Fill the moulds all the way, don't worry about the batter spilling over during steaming -  it won't.
5) Do not let water into your batter, not even a drop. They are really sensitive and won't rise as nicely if that happens.

Ingredients

(A)
3 eggs
130g sugar
1/4 salt
100g corn oil
(B)
100g Orange juice
(C) Sift together
180g flour
20g cocoa powder
1tsp baking soda/sodium bicarbonate
2tsp baking powder

Directions

1. Whisk A together until sugar dissolves and add in B, mix until well blended.
2. Mix in sieved C, mix until well combined.
3. Pour into cup fillers, slightly more than 1/2 cup.
4. Steam for 10 mins and let it cool before you place the flower marshmallow on top (use a little nutella to stick the marshmallow to cupcakes).

Sunday, October 21, 2012

Wonders of Agar Agar


I am submitting this recipe to the Aspiring Bakers #24 (October 2012) : Jellies & Puddings hosted by Charmaine of MiMi Bakery House. I found this Milo Agar Agar quite interesting and made some modification to it. I have added Oreo/Chocolate balls/KitKat to the milk layer to create another magnificient flavour and texture. Thanks to my friend, Shirlyn Lee for the pretty flower bottles. 

Ingredients

Milo Layer:
6 gm agar agar powder
500 ml water
90 gm sugar
5 heaped tbsp Milo powder

Milk Layer:
6 gm agar agar powder
300 ml water
90 gm sugar
200 ml Carnation Low Fat Evaporated Milk 
A few drops of vanilla essence
Filling (your preference):
1) Oreo (break into pieces but keep the sandwich together)
2) Chocolate balls
3) Kit kat (break into pieces)

Directions

1. In a pot, add water, sugar, Milo and agar agar powder into a pot. Cook until all has been dissolved.
2. In another pot, add water, sugar, agar agar powder and Carnation Low Fat Evaporated Milk into a pot. Cook until all has been dissolved. Stir in vanilla essence.
3.Carefully spoon the milo mixture for the base. let it set slightly on surface before pouring the milk layer on top.
4. Sprinkle oreo cookies & let it set and pour the milo mixture on top.

Tips:
1) Do not wait until the layer is completely set before pouring the next layer, or else it will not stick.
2)Make sure the mixture is still hot when pouring on the earlier layer so that it will stick well.

Sunday, October 14, 2012

Vanilla Butter Cake

Made this Vanilla Butter Cake with Chocolate Rice for one of my colleague who will be leaving our company soon. Interestingly, this recipe (which I got from Women's Weekly Magazine) was very soft and less buttery. Will try to make the vanilla icing the next time I make this cake.

Ingredients

125g butter
170g caster sugar
1 tsp vanilla essence
2 eggs
250g self-raising flour (sifted)
120g fresh milk
Chocolate rice for toppings.

Vanilla Icing* (Optional)
220g icing sugar
15g butter
1-2 Tbsps hot water
1 tsp vanilla essence

Directions

1. Preheat oven at 180 deg C. Lightly grease and line a deep 20cm round cake pan.
2. In a large bowl, using an electric mixer, beat butter, sugar and vanilla essence together until pale and creamy. Add eggs one at a time, beating well after each addition, scraping down sides of bowl.
3. Lightly fold flour into creamed mixture alternating with milk, beginning and ending with flour.
4. Spoon mixture into pan, smoothing top. Bake 40 to 45 mins, or until a skewer comes out clean. Cool on a pan for 5 mins, before turning onto wire rack to cool completely.

Note : * For icing, sift icing sugar into a bowl  Add butter, water and vanilla. Beat well until mixture has a smooth, spreadable consistency. spread over cooled cake.

Orange Agar-Agar


Since I have alot of oranges left making the Orange Muffins without butter, I made used of the orange juices to make these Orange Agar-Agar. A very easy recipe to ripe up a nice refreshing desserts for a  hot day. 


Ingredients

2tsp agar-agar powder
400ml pure orange juices (from 4 oranges) or mix with store-bought orange juices
50g rock sugar

Directions

1. Cut the orange to half. Extract the juice using a manual juice extractor, drained.
2. Remove the flesh and reserve the orange “shell”.
3. Mix agar-agar powder, orange juices and rock sugar in a saucepan.
4. Bring to boil till rock sugar dissolved, drained. Cool the mixture slightly.
5. Pour into the reserved orange “shells”.
6. Chill in the refrigerator for several hours till cool and set. Serve chilled.

Orange Muffins without Butter

I always feel disheartened doing folding method (the cake usually don't rise well) but I have decided to give it another try on these Orange Muffins. I was also attracted with this recipe that does not use butter and indeed the texture was fantastic! I have succeeded with the folding this time and the muffins were light, spongy with a strong orange aroma.  

Ingredients

3 egg yolks
30g Sugar
35g fresh orange juice
Orange zest from one large orange
70g natural yoghurt
80g plain flour
10g corn flour
1/2 tsp baking powder
A pinch of salt

3 egg whites
70g sugar

Directions

1. Beat egg yolks and sugar until white at medium speed and add orange juice, natural yoghurt and mix well.
2. Remove bowl from machine, add in sifted flour (plain flour, corn flour & baking powder) and mix well with a hand whisk, follow by orange zest, mix well again.
3. Whisk egg whites and sugar until peak form.
4. Fold 1/4 of egg white to egg yolk mixture with a rubber spatula until well mix and fold in remaining egg white in two batches.
5. Scoop batter into muffin liners to 3/4 full and place them on a baking tray.
6. Bake at preheated oven at 170C for about 25-30 minutes or until skewer inserted comes out clean.
7. Bang the baking tray together with the small cakes on the counter top 2-3 times once they are cooked, as this will prevent the cakes shrink. Leave to cool and store them in an airtight container in room temperature for 2-3 days.

Sunday, October 7, 2012

Steamed Pumpkin Pau

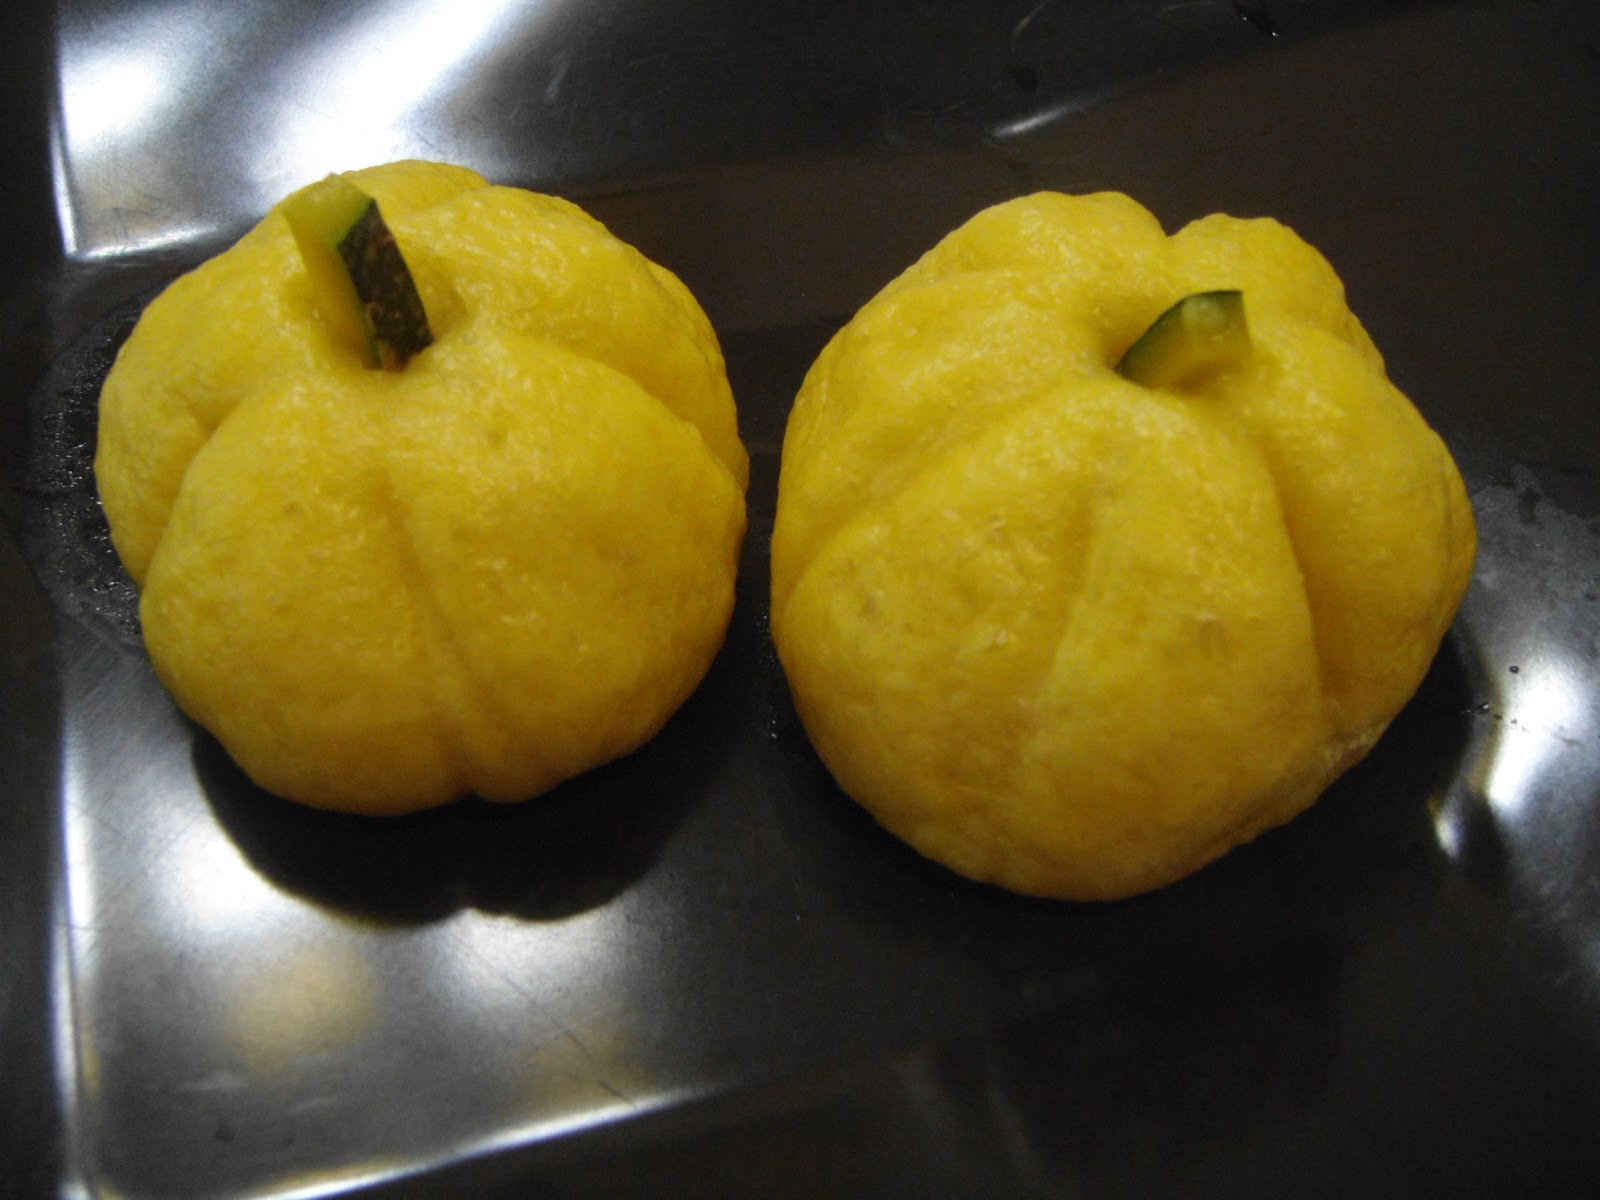
I had some leftover mooncake lotus paste and so I decided to make these steamed Pumpkin Pau with them. I adapted this recipe from Nasi Lemak Lover but I guessed my skills wasn't as good compared to hers. I found the dough of 30g a bit too much (as it will rise larger), I reduced to 25g instead. My MIL and my girl said it was nice, tasted like the normal pau sold outside.


Ingredients

150g mashed pumpkin
225g all purpose flour
1 tbsp sugar
1/3 tsp salt

To make Yeast water
1 tbsp lukewarm water
1 tsp sugar
1 tsp instant yeast

Filling
Lotus paste (you can replaced with red bean paste, peanut or etc)
Pumpkin skin- cut into small piece to make as pumpkin’s stem

Directions

1. Add in all ingredients and yeast water in a mixing bowl and knead till smooth dough.
2. Cover with damp cloth and rest for 60 mins.
3. Knock down dough to expel some air, transfer to a lightly floured surface and knead for a while.
4. Weigh out 25g of dough and roughly shape into a ball.
5. Weight lotus paste 15g and lightly shape into ball.
6. Fatten out the dough into a circle. Place lotus filling onto the center, wrap and pleat up the sides and seal.
7. Use a butter knife, mark from top and lightly press down towards bottom, keep a small gap in between, repeat this step till whole dough ball finished. Place a small piece of pumpkin skin at the middle and lightly press down.
8. Place the pumpkin buns (pleat area face down) onto a piece of greaseproof paper, on the rack for steaming. Cover with a piece of damp cloth and let rise for another 10-15 mins.
9. Lightly mark bun with butter knife again (to sharpen the pattern), steam the buns under rapidly boiling water on high heat for about 15mins.
10. Wait for 2mins then only open the lid and remove from the steamer.

Chocolate Walnuts Brownies

Saw this recipe in one of the magazines with very simple steps, so I gave it a shot. Since I am not a chocolate person, I will not know if these are the perfect brownies. Got my 2 nephews and my 2 kids tasted and glad to hear they found it delicious. For those who like chewy and not too fudgy type of brownies, I think you will like them.

Ingredients

100g plain chocolate
125g unsalted butter
2 eggs
130g caster sugar (reduced from 150g)
1/2 tsp vanilla extract
65g all-purpose flour
100g chopped walnuts

Directions

1. Add the soft butter to the melted chocolate. Mix together with the hand whisk.
2. With an electric mixer, whisk the eggs and sugar together, and add in chocolate mix.
3. Add vanilla extract, flour and stir in walnuts. Mix well.
4. Pour the mix into a baking tin and level with a spatula.
5. Bake at 190 deg C for 35-40 mins.

Sunday, September 30, 2012

Mooncakes (Orders 2012)

These were the Cartoon Character Snowskin mooncakes I made this year, aren't they cute? I used the same recipe I made in the past years but reduced the weightage of the snowskin from 18g to 15g and the paste from 25g to 22g. I have also used more flavoured pastes such as mango, strawberry, green tea, pandan and apple. Even included chocolate balls in the paste and it really tasted yummy! The low sugar lotus paste that I bought from KCT (near Aljunied MRT) was a better choice compared to PH's paste which was more oily.

Many thanks for the orders from my colleagues and friends. It was really a great accomplishment to make these Cartoon Characters Mooncakes.


Together with my colleagues (Liz and Oseu), we had a wonderful time making all these beautiful flower mooncakes!

Sunday, September 23, 2012

Mixed Fruits Rainbow Cake

I had this strong desire to make a colorful cake and also had the craving for mixed fruits, so I came up with this Mixed Fruits Rainbow Cake. When the cake was done, I was so excited to see if the colours would turn out pretty and it really did! I felt so happy and a great accomplishment seeing my own cake creation with  the beautiful colors in it. A thumbs up for myself! 


Ingredients

  • 250g butter
  • 150g Castor sugar
  • 250g self raising flour (sifted)
  • 5 eggs
  • 1.5 tsp vanilla essence
  • Mixed fruits
  • coloring (Pandan Paste & red coloring) 

Directions

1. Mix butter and Castor sugar until white.
2. Add eggs one at a time. Mix evenly. 
3. Add flour and mix using low speed.
4. Separate batter into 3 portions, add vanilla essence to 1 portion, add red coloring to 2nd and add pandan paste to the 3rd.
5. Pour each layer of batter according to your preference into cake tin (20 X 20cm).
6. Sprinkle mixed fruits on top of batter.
6. Bake at 180 degree C for 45-55 mins.

Sunday, September 16, 2012

Orange Butter Cake with Almond Crust

Had this craving for orange cake and I found the recipe with almond flakes interesting, so I decided to combine them together. As I am making a loaf for a friend, I poured the balance batter into a 20cm X 20cm which came out quite shallow for a cake. However, with the almond flakes, it came out nice for a small bites.

Made some modification, I reduced the sugar from 225g to 180g and 12tbps of milk to 8tbsp milk & 4tbps orange juice (hoping to have more orange flavour but the almond toppings overwhelmed the orange flavours). As for the honey crust, I have increased  the almond flakes from 90g to 120g as I  have quite a fair bit of the honey mixture. The next time I bake this again, I will want to reduce the honey to 30g as I find it abit too sweet.

Ingredients

195g all-purpose flour
1 1/2 tsp baking powder
1/2 tsp salt
170g unsalted butter, softened
180g sugar (reduced from225g)
1 large egg, plus one large egg yolk
1 1/2 tbsp orange zest
8 tbsp whole milk
4 tbsp orange juice (additional ingredients)

Honey Almond Crust
120g almond slices (increased from 90g)
30g honey (reduced from 50g)
30g butter

Directions

1. Preheat oven to 190 degrees celsius. Butter and line cake pan. (I used a 20cm X 20cm pan & a loaf pan)
2. In a medium bowl, whisk together flour, baking powder and salt.
3. Using a mixer, cream butter and sugar until fluffy.
4. Beat in orange zest, then eggs.
5. Add flour mixture in 3 parts, alternating with milk & orange juice.
6. Beat just until batter appears uniform. The batter should look thick and creamy.
7. Pour batter into prepared pan and smooth top with spatula.
8. Bake for about 40 minutes, or until it reaches a dark-gold color and an inserted cake tester comes out clean. (Cover with aluminium foil if the top brown too fast)
9. While the cake is baking, prepare honey and almond crust topping. Add butter, honey and almond slices into a shallow saucepan. Heat to melt the butter and honey, ensuring that the almond slices are well-coated with the honey-butter mixture.
10.Top with the honey almond crust mixture evenly over the cake and return the cake to the oven at 180C until the almond are roasted to a lovely golden brown, which takes approx. 8-10 mins.
11.Wait for the cake to cool down before slicing.

Sunday, September 9, 2012

Mini Cheddar Cheese Cupcakes


Celine is the baker for the day and she is baking Mini Cheddar Cheese Cupcakes. Just follow this video clip and you will be able to master it with your kids. Enjoy!


Ingredients

180g Butter
130g Sugar
3 Eggs
165 Self raising flour
100g Grated Cheddar cheese
2tbsp Full cream milk

Directions

1. Beat butter, sugar and eggs together.
2. Dump in flour, mix at low speed for a minute.
3. Add in grated cheddar cheese and milk and mix for 30 seconds.
4. Scoop batter into cupcake cases.
5. Bake at 170C for 25 mins.
6. Cool on wire rack.

Saturday, September 8, 2012

Fried Banana Fritters

I decided to make this Fried Banana Fritters (I love these from the Malay food stall) since I have leftover bananas from making Soft Banana Cakes. An easy recipe and I am happy that I can made these fritters myself. Yummy! 

Ingredients

400gm bananas(mashed)
125gm all purpose flour
1/3 tsp baking soda
70gm sugar (original 80gm)
Small pinch of salt
Oil for frying

Directions

1. Sift flour with baking soda. Mix with bananas, sugar and salt.
2. Drop teaspoonful of batter into hot oil.
3. Fry until brown, nicely caramelized colour.
4. Drain excess oil off fritters on kitchen towels.

Soft Banana Cupcakes

Made these cupcakes for breakfast and everyone in the family were so happy to have them fresh out from the oven. Saw this recipe and was curious if it was really that soft as described. The methods were much easier than Spongy Banana Cake which only fold in the flour. Overall texture is soft but will know if it's still soft tomorrow. 
P.S. The texture was wet the next 2 days,  I felt it tasted better when heated up in microwave before eating. 

Ingredients

80g Canola or sunflower oil
70g Castor sugar
1 Large egg, lightly beaten
125g Plain flour
1/2 tsp Baking powder
1/2 tsp Baking soda
4 medium-sized bananas, mashed with a fork (about 160g)
25g Evaporated milk or regular milk
1/4 tsp Vanilla extract

Directions

1.Beat egg and sugar till light and creamy.
2.Add milk, mashed bananas, oil and vanilla extract, and combine.
3.In a separate bowl, sift flour, baking powder and baking soda, and give a quick whisk.
4.Pour flour into the wet ingredients until no traces of flour remain. (I used hand whisk to fold the flour) Do not over-mix. Stop the moment everything is incorporated.
5.Pour into a lined 6-inch round tray (I used 8 cupcake cases)
6.Bake at 175C for about 20-25 mins, or until cooked.

Sunday, September 2, 2012

Fruit Tarts

I always like the egg tarts pastry crust and so when I found the recipe to make the pastry cream, I decided to use the egg tarts pastry crust to make a fruit tart. Amazingly, its a wonderful match and all came together in great combination! The pastry was crusty and the fresh fruits added a refreshing taste to the pastry cream. Everyone in my family (inclusive my hubby who usually don't eat such pastry) enjoyed it very much. 

Ingredients

Pastry Crust
100g Sugar
1 Egg
175g Butter
350g Plain flour

Pastry Cream
300ml milk
1tsp vanilla extract
3 large egg yolks
50g Castor sugar
20g plain flour
20g corn flour

Toppings
Sliced Peach (can)
Strawberries
Kiwi 

Directions

Pastry Crust
1. Preheat oven to 180 degree Celsius
2. Place sugar, egg and butter in mixer and beat until sugar is just dissolved. Add sifted plain flour and mix until dough holds together. press dough evenly to springform tart pan.
3. Bake at 180 degree Celsius for 20 mins, then remove and let cool.
Pastry Cream
1. In a medium-sized heatproof bowl, mix the sugar and egg yolks together.
2. Combine flour and corn flour together and then add to the egg mixture, mixing until you get a smooth paste.
3. In a saucepan bring the milk to just boiling (just until milk starts to foam up.)
4. Remove from heat and add slowly to egg mixture, whisking constantly to prevent curdling.
5. Then pour the egg mixture back into the saucepan and cook over medium heat until thicken, whisking constantly.
6. Remove from heat, add vanilla extract and continue to whisk mixture for another 30 - 60 seconds until it becomes smooth consistency.
7. Pour into a clean bowl and immediately cover the surface with plastic wrap to prevent a crust from forming. Cool to room temperature before using. If not using right away refrigerate until needed, up to 3 days. Whisk or stir before using to get rid of any lumps that may have formed.
To Assemble
1. Spread pastry cream evenly over cooled crust.
2. Top with fruits and glaze with peach syrup to prevent fruits from drying up.

Steamed Pumpkin Muffins

Wow wee...I have never thought this was an easy recipe as I always feel that it needs a lot of technique and "lucky" hand for it to rise correctly but I made it! This recipe is very simple to follow and once I opened the steamer, I can see all the muffins smiling at me beautifully. There are 2 ingredients that I modified in this recipe. I reduced the sugar from 120g to 80g and used self-raising flour instead of cake flour (cos I ran out of cake flour). The muffins turned out to be soft, fluffy and the sweetness were just right.

Ingredients

125gm steamed pumpkin flesh
1 egg
80g sugar
100g evaporated milk
30g corn oil
Sieve together:
180g cake flour/Self-raising flour
20g rice flour
1.5tsp baking powder

Directions

1. Prepare your steamer and bring the water to a boil.
2. Put steamed pumpkin flesh, egg, sugar, milk and oil and mix well.
3. Add in flour mixture and mix until well combined.
4. Spoon into lined steaming cups and steam for 15 mins. It will bloom by itself, no need to make a cross with oil.